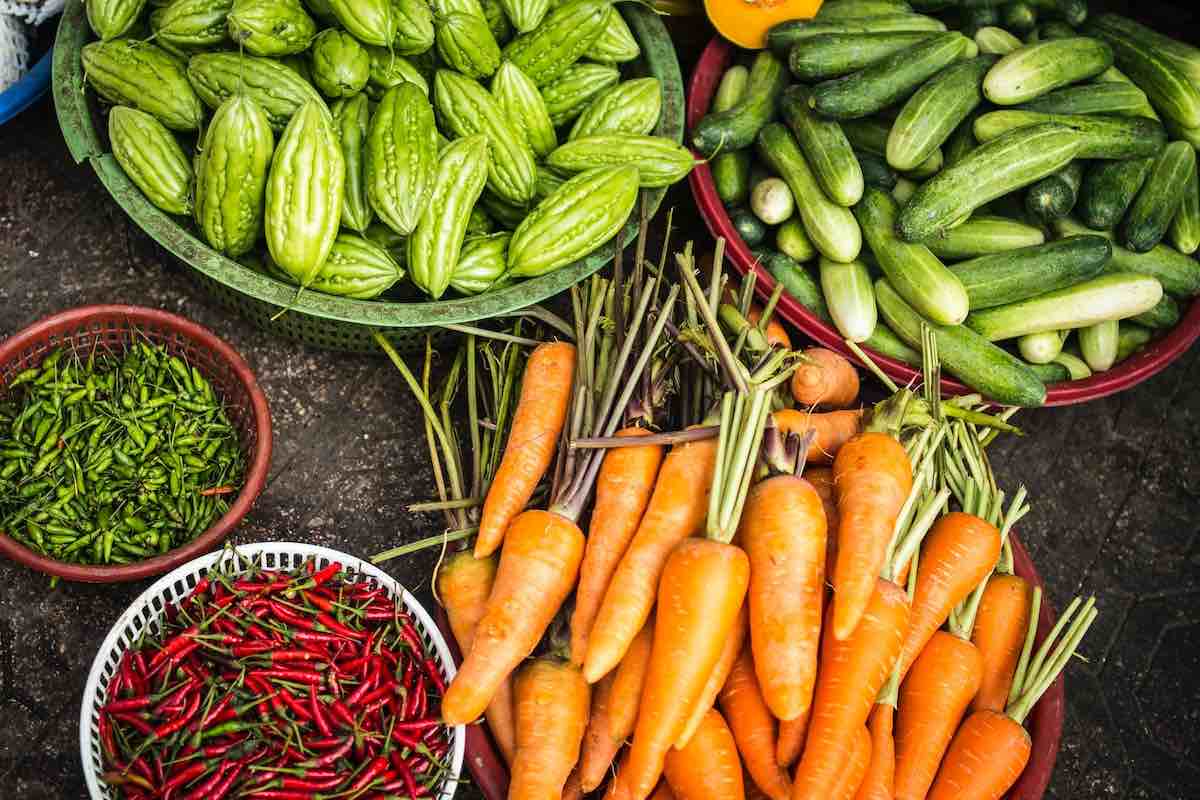
Some vegetables genuinely make each other better neighbors, and some quietly sabotage each other’s growth. Companion planting is the practice of pairing crops that help one another — through pest deterrence, nutrient sharing, or simple use of space — while keeping the bad pairings apart.
It’s one of the oldest tricks in farming and home gardening alike, and you don’t need a science degree to use it well. You mostly just need a reliable companion planting chart to reference when you’re laying out beds each spring.
This guide covers the classic companion planting pairings, the combinations you should actively avoid, and a full reference chart you can come back to season after season.
We are now living in an era of great progress and urbanization. Places that are previously remotely populated are now bustling districts with towering skyscrapers and multi-lane expressways.
As more people are adapting to the urban lifestyle, it is imperative that an abundant food source and healthy living can be sustained.
This is why urban farming has become a staple in urban households all around the globe. But what is the difference between traditional and urban farming?
There was a time when the only means of growing food was through large-scale farming. Acres of land are planted with crops and come harvest time, the goods are delivered and distributed to towns and cities.
But as the population grows and more areas become urbanized, alternative means of sourcing food must be formulated.
In the urban setting, there are a lot more factors to consider when sourcing food. There is the matter of limited space, inaccessibility to agricultural districts, carbon footprint, and water scarcity.
The need for a more sustainable way of producing food has paved the way for urban farming.
Compared to traditional farming, urban farming only requires a very small space, needs smaller quantities of water, and emits fewer greenhouse gasses.
Microgreens have become a popular choice for urban farmers looking to grow their own food in a small space, much like an urban farm.
These tiny greens are packed with nutrition and flavor, making them an ideal way to add freshness, texture, and color to any meal or to your urban garden.
Not only are they easy to cultivate indoors or outdoors, but they also require minimal effort compared to other types of gardening.
The most popular types of microgreens for urban farmers are arugula, basil, chard, kale, cilantro, and radish.
In this article, we’ll explore why these delicious little plants have become popular among city dwellers and provide helpful tips on how you can start growing your own microgreens today!
Growing one crop per field per year leaves a lot of potential on the table. Multiple cropping (also called multicropping) is the practice of growing more than one crop on the same piece of land in a single year – either at the same time, in sequence, or in carefully planned rotations.
Multiple cropping is any system that grows two or more crops on the same land in the same year. The main types are double cropping (two crops in sequence on the same plot in one year), intercropping (two or more crops growing together at the same time), relay cropping (planting the next crop before the current one is harvested), and sequential cropping (back-to-back crop cycles with no overlap).
Done well, multicropping lifts yield per acre, spreads weather and market risk, and builds healthier soil. Done badly, it drains nutrients, increases pest pressure, and wears out the land. This guide breaks down the types, the pros and cons, what to plant together, and when double cropping specifically is worth it on a US farm or homestead.
Growing a few high-value crops is now a realistic income stream for small-scale farmers and backyard growers across the US. The good news is that you do not need hundreds of acres to make it work. Some of the most profitable crops thrive in tight spaces, and a well-chosen quarter-acre plot can outperform a large commodity field on a per-acre basis.
This guide breaks down the most profitable crops you can grow on a small farm, with updated revenue estimates for 2026 and practical notes on harvest timelines, growing conditions, and where to sell. Whether you are exploring homesteading for the first time or looking for profitable farming ideas to boost an existing operation, this list will help you decide where to put your effort.
What Makes a Crop Profitable?
Profitability comes down to three things: what the market will pay per pound or unit, how much you can grow per acre, and what it costs to produce. Commodity crops like corn and wheat deliver thin margins because prices are set globally and production is mechanized at industrial scale. Specialty crops flip that equation: lower volume, much higher price per unit, and margins that commodity farming simply cannot match.
Several factors shape whether a specific crop is profitable for your situation:
Market price is the single biggest lever. If buyers will pay $20 per pound for gourmet garlic versus $2 for conventional, your revenue per acre changes dramatically.
Input costs matter just as much. An expensive fertilizer program or irrigation setup can eat into margins fast, so track every cost carefully.
Growing conditions including your climate zone, soil type, and access to water all determine which crops are realistic for your land. A drought year can wipe out an otherwise profitable harvest. For those growing on smaller plots, pairing profitable crops with the right home and garden infrastructure — raised beds, drip irrigation, quality soil — makes a real difference to your bottom line.
Selling channel affects what you can charge. Direct-to-consumer at farmers markets and through CSA subscriptions typically pays 2-3x more than wholesale.
Below are the highest-value crops for small and backyard farms, grouped by category. Each entry includes current revenue estimates, harvest timelines, and what to expect if you are starting from scratch. Also check out our guide to the most popular microgreens to grow for another high-profit option.
Herbs and Spices
Herbs and spices consistently rank among the most profitable plants to grow on a small farm. Their high price per pound, low space requirements, and strong consumer demand make them a natural starting point for new growers.
Lavender
Lavender remains one of the most versatile and profitable crops for small acreage. You can sell dried bundles, essential oil, sachets, soaps, and other value-added products. Many successful lavender farms also generate income from agritourism, with visitors paying to walk the fields and buy directly.
Time from Planting to Harvest
Lavender takes 90 to 200 days to reach its first harvest from seed. However, these plants are slow growers and typically need 2 to 3 years to reach full production maturity. Most growers start with established cuttings or plugs to speed up the timeline.
90 to 200 days to first harvest
Revenue Estimates
An established acre of lavender can generate $10,000 to $30,000 per year from dried bundles and essential oil. Growers who create value-added products (soaps, lotions, culinary blends) or run agritourism events report revenues as high as $75,000 to $120,000 per acre in peak years, though those numbers require significant marketing effort and an established customer base.
$10,000 to $30,000 per acre (dried/oil), up to $120,000 with value-added products
Saffron
Saffron is the world’s most expensive spice by weight. Each delicate stigma must be hand-harvested from the Crocus sativus flower, and it takes roughly 75,000 flowers to produce a single pound of dried saffron. That labor intensity is what keeps the price high and makes it one of the most profitable crops per square foot for patient growers.
Time from Planting to Harvest
Saffron corms are planted in late summer and flower in about six to ten weeks during fall. The plants are perennial, producing larger yields each year as the corms multiply. Expect meaningful harvests by year two or three.
6 to 10 weeks from planting to first flower
Revenue Estimates
Premium-grade saffron sells for $8,000 to $15,000 per kilogram at retail in 2026, with wholesale prices ranging from $2,500 to $3,800 per kilogram depending on grade and certification. A small half-acre plot can yield 1.5 to 2.5 kg annually once established, generating $3,750 to $37,500 depending on whether you sell wholesale or direct to consumers. Organic certification commands the highest premiums.
$8,000 to $15,000 per kilogram retail (2026 pricing)
Gourmet Garlic
Gourmet garlic varieties like Purple Stripe, Rocambole, and Porcelain are not the same as the standard garlic you find at grocery stores. They carry bolder flavors, unique color profiles, and price tags that make them one of the most accessible high-value crops for small farms. The US garlic market is valued at roughly $2.25 billion and growing at about 3.5% annually, so demand is steady.
Time from Planting to Harvest
Garlic is planted in fall and harvested the following summer, so plan on about 8 to 9 months from clove to bulb. Hardneck varieties (the gourmet types) do best in cooler climates with a proper winter chill period.
8 to 9 months from planting to harvest
Revenue Estimates
Gourmet garlic sells for $16 to $25 per pound at farmers markets, compared to $1 to $2 per pound for conventional. A well-managed acre can yield 6,000 to 12,000 pounds, putting gross revenue between $25,000 and $100,000 per acre depending on variety, growing conditions, and sales channel. After subtracting costs, net profit of $15,000 to $80,000 per acre is realistic for established operations.
$25,000 to $100,000 gross revenue per acre
Fruits and Vegetables
High-value fruits and vegetables are among the most profitable crops for small farms, especially when sold direct to consumers. If you are new to growing, start with our guide on why you should grow your own vegetables.
Goji Berries
Goji berries are a superfood packed with antioxidants, vitamins, and minerals. They can be sold fresh, dried, juiced, or added to trail mixes and smoothie blends. Health-conscious consumers continue to drive strong demand for locally grown goji berries, especially organic and pesticide-free options.
Time from Planting to Harvest
Goji shrubs are a long-term investment. They take 2 to 3 years to begin producing fruit and 3 to 5 years to reach full maturity. Once established, however, they produce reliably for 15 to 20 years with minimal maintenance.
2 to 3 years to first fruit, 3 to 5 years to full production
Revenue Estimates
At full maturity, one acre of goji berries can produce around 7,000 pounds of fruit. Dried goji berries sell for $15 to $25 per pound at retail, while fresh berries at farmers markets command even higher prices. Annual revenue of $40,000 to $50,000 per acre is achievable once plants are fully established.
$40,000 to $50,000 estimated revenue per acre at full maturity
Cherry Tomatoes
Cherry tomatoes are a high-value crop that can be grown almost anywhere, including in containers on a patio. You can even grow cherry tomatoes in pots at home. Their fast turnaround and steady demand at farmers markets make them an excellent choice for beginners looking for quick returns.
Time from Seed to Harvest
Cherry tomatoes grow fast. Most varieties are ready to pick within 7 to 8 weeks after transplanting, and plants continue producing for several months through the growing season.
7 to 8 weeks from transplant to harvest
Revenue Estimates
Heirloom and specialty cherry tomatoes sell for $3 to $5 per pint at farmers markets. A productive acre can yield 15,000 to 25,000 pounds per season, with gross revenue of $10,000 to $25,000 depending on variety and sales channel. The real advantage is the fast turnaround, meaning you can plant successive crops and maximize your growing season.
$10,000 to $25,000 per acre per season
Arugula
Arugula is a nutrient-dense salad green with a peppery flavor that restaurants and consumers love. It grows quickly, tolerates cool weather, and does not need much space, making it ideal for small-scale growers.
Time from Seed to Harvest
Plant arugula in early spring or early fall for the best results. You should see harvestable leaves within 4 to 6 weeks of sowing. Because it bolts in hot weather, timing your planting around cooler months gives you the longest harvest window.
4 to 6 weeks from seed to harvest
Revenue Estimates
Arugula sells for roughly $6 to $8 per pound at farmers markets and to restaurants. One acre can yield up to 9,000 pounds per year with successive plantings, putting estimated gross revenue at $54,000 to $72,000 per acre. Even on a small raised bed, arugula provides strong returns relative to the space and effort involved.
$54,000 to $72,000 estimated revenue per acre
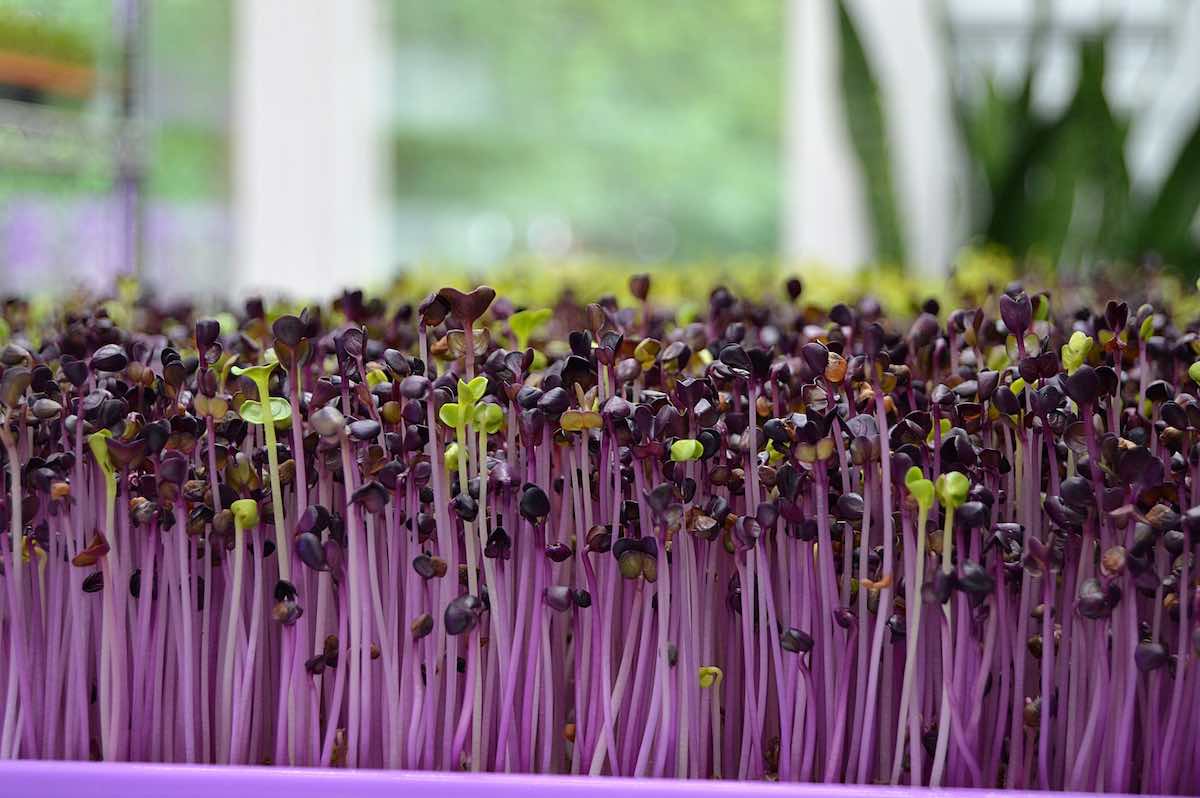
Microgreens
Microgreens are young vegetable and herb seedlings harvested just 7 to 14 days after sprouting. They are one of the fastest-growing segments in the specialty produce market and arguably the most profitable crop per square foot that a small grower can produce. You do not even need outdoor land since most microgreen operations run indoors with shelving, trays, and LED grow lights.
Time from Seed to Harvest
Most microgreen varieties are ready to cut in 7 to 14 days from seeding. That rapid cycle means you can turn over the same tray space 20 to 30 times per year, which is what drives the high revenue-per-square-foot numbers.
7 to 14 days per harvest cycle
Revenue Estimates
Microgreens sell for $25 to $50 per pound at farmers markets and to restaurants. Each standard 1020 tray costs about $3 to $5 to produce and can yield $15 to $30 in revenue. A modest 500-square-foot indoor setup with vertical shelving can generate $25,000 to $50,000 per year once you have established a reliable buyer base. The key is securing committed buyers (restaurants, grocery stores, CSA customers) before you scale up production. For a deeper dive, see our guide to the most popular and profitable microgreens.
$25,000 to $50,000 per year from a 500 sq ft indoor setup
Edible Fungi
Gourmet mushrooms are often overlooked, but they are among the most profitable crops per square foot for small farms. Unlike most crops, mushrooms do not require sunlight or large fields. They thrive in climate-controlled indoor spaces, making them perfect for urban growers or anyone with a spare basement, garage, or shipping container.
Gourmet Mushrooms
Oyster mushrooms, lion’s mane, and shiitake are the top sellers in the gourmet mushroom market. Oyster mushrooms are the easiest variety to start with since they grow quickly and tolerate a wide range of conditions. Lion’s mane has surged in popularity thanks to growing consumer interest in functional foods and cognitive health benefits.
Time from Inoculation to Harvest
Most gourmet mushroom varieties produce their first flush within 3 to 4 weeks after inoculation, with the full crop cycle (including spawn preparation) running about 7 to 8 weeks. Indoor growers report better and more consistent yields than outdoor operations.
7 to 8 weeks full crop cycle
Revenue Estimates
Gourmet mushrooms sell for $8 to $15 per pound at retail, with lion’s mane and specialty varieties commanding the highest prices. A small 500-square-foot indoor growing room can produce 12,000 pounds of oyster mushrooms per year, translating to $72,000 to $120,000 in gross revenue. Even after factoring in substrate, energy, and labor costs (which typically consume 35% to 50% of revenue), mushroom farming offers some of the strongest margins in small-scale agriculture.
$72,000 to $120,000 gross revenue from 500 sq ft
Cut Flowers
Cut flower farming has boomed in the US over the past few years, driven by demand for locally grown, seasonal blooms for weddings, events, and direct-to-consumer bouquet subscriptions. Unlike imported flowers, locally grown cuts are fresher, last longer in the vase, and carry a story that buyers value. For small farms with even a quarter-acre of growing space, flowers can be one of the most profitable crops per acre.
Time from Seed to Harvest
Most annual cut flowers (zinnias, sunflowers, cosmos, snapdragons) are ready to harvest 8 to 12 weeks from seeding. Perennials like peonies and dahlias take longer to establish but produce reliably year after year once they are in the ground.
8 to 12 weeks for most annual varieties
Revenue Estimates
Small flower farms report average gross sales of $25,000 to $50,000 per acre, with high-intensity growers reaching $55,000 to $60,000 per acre. Net profit margins of 50% to 60% are common for direct-to-consumer operations selling through farmers markets, flower CSAs, and wedding florists. The most successful small flower farms combine multiple sales channels to keep revenue consistent throughout the growing season.
$25,000 to $50,000 per acre, with 50-60% net margins
Other Profitable Crops Worth Considering
Beyond the crops above, several other options deserve a spot on your shortlist depending on your climate, space, and goals.
Ginseng
American ginseng is one of the highest-value crops you can grow, but it requires patience. The roots need 5 to 6 years to mature before harvest. Once ready, a single acre can generate up to $200,000 when roots, rootlets, and seeds are all factored in. Ginseng grows best in shaded woodland settings, making it a strong option if you have forested land that would otherwise sit unused.
Christmas Trees
Christmas trees are a seasonal but reliable cash crop. Trees take 6 to 10 years from planting to sale, so this is a long game. However, retail prices of $60 to $100+ per tree and the ability to plant 1,000 to 1,500 trees per acre mean that a mature acre can generate $60,000 to $150,000 in a single harvest season. Many tree farms also supplement income with wreaths, garlands, and agritourism experiences. As a secondary benefit, you also get great firewood from trimming and culled trees.
Sugar Crops and Soybeans
If you have more acreage to work with, traditional cash crops like sugar cane, sugar beets, and soybeans still offer solid margins. These require more land and equipment than the specialty crops above, but they benefit from established supply chains and government support programs. Soybeans in particular remain one of the most consistent earners for mid-size operations across the US.
How to Maximize Your Crop Profits
Choosing the right crop is only half the equation. How you grow and sell it matters just as much. Here are a few principles that apply across all of the crops on this list:
Sell direct whenever possible. Farmers markets, CSA subscriptions, and direct restaurant sales typically pay 2-3x more than wholesale channels.
Start small and validate demand. Grow a test batch before committing a full acre. Make sure buyers exist in your area before you scale.
Stack multiple crops. The most profitable small farms often grow 3 to 5 complementary crops rather than betting everything on one — our companion planting chart is a good starting point for which crops actually help each other.
Invest in proper irrigation. Consistent water delivery is one of the biggest factors in yield consistency. See our complete guide to farm irrigation systems for help choosing the right setup.
Add value where you can. Drying herbs, making jams, bundling bouquets, or creating ready-to-eat microgreen mixes all increase your revenue per unit.
Conclusion
You do not need a massive farm to earn a meaningful income from growing crops. The most profitable crops for small farms share a few common traits: high price per pound, strong consumer demand, and the ability to grow well in limited space. Lavender, saffron, gourmet garlic, mushrooms, microgreens, and cut flowers all fit that profile.
The best approach is to pick two or three crops that match your climate, available space, and local market demand. Start with a small test plot, find your buyers, and scale from there. Whether you are working a quarter-acre backyard or a dedicated five-acre homestead, the crops on this list offer real earning potential for growers willing to put in the work.
Related: Once you have a profitable crop, consider pairing it with another in a multiple cropping system to get two harvests from the same ground in a single season.
Permaculture is one of those words that gets tossed around in farming and gardening circles, but few people can explain exactly what it means or how to put it into practice. At its core, permaculture is a design system for creating agricultural ecosystems that are productive, sustainable, and largely self-maintaining. Instead of fighting nature with chemicals and heavy machinery, you work with natural patterns to build something that feeds you while regenerating the land.
Whether you are planning a backyard garden or mapping out a multi-acre homestead, understanding permaculture principles can save you time, money, and a lot of wasted effort. This guide covers what permaculture is, how its core principles and zones work, and practical steps to start your own permaculture garden.
What is Permaculture?
Permaculture is a design philosophy for building human habitats that mimic the patterns and relationships found in natural ecosystems. The word itself combines “permanent” and “agriculture” and was coined by Australian ecologist Bill Mollison and his student David Holmgren in the late 1970s.
The idea is straightforward: nature has spent billions of years optimizing how ecosystems work. Forests do not need tilling, fertilizing, or pest control, yet they produce massive amounts of biomass year after year. Permaculture takes those natural strategies and applies them to how we grow food, manage water, build soil, and organize our land.
The three ethical pillars of permaculture are:
Care for the earth by protecting soil, water, and biodiversity
Care for people by providing for basic human needs
Fair share by returning surplus to the system and limiting consumption
Recent research backs up the approach. A 2024 study published in Communications Earth & Environment found that permaculture sites showed 27% higher soil carbon stocks than conventional fields, 201% more earthworms, and 457% greater plant species richness. Bird species diversity was nearly three times higher on permaculture land compared to conventional farmland in the same region.
Permaculture design is guided by a set of principles that apply whether you are working with a quarter-acre backyard or a 50-acre farm. These are the most important ones to understand before you start planning.
Observe and Interact
Before you change anything, spend time watching how your land works. Where does water flow after rain? Which areas get full sun versus shade? Where does frost settle first? A full year of observation before making major changes will save you from costly mistakes. Understanding your land’s natural patterns is the foundation of every good permaculture design.
Catch and Store Energy
This principle is about capturing resources when they are abundant so you can use them during lean times. Practical examples include harvesting rainwater with rain barrels or cisterns, using solar panels for energy, preserving your harvest through canning and drying, and building soil organic matter that holds moisture through dry spells.
Produce No Waste
In a well-designed permaculture system, nothing is wasted because every output becomes an input for something else. Kitchen scraps become compost. Compost feeds the garden. The garden feeds you. Animal manure fertilizes crops. Pruned branches become mulch or firewood. The goal is closed-loop cycles where waste simply does not exist.
Design from Nature
Nature is incredibly efficient, and permaculture design aims to replicate those patterns. Companion planting, where you grow plants together because they benefit each other, is one of the most common applications. For example, the “Three Sisters” guild of corn, beans, and squash has been used by Indigenous farmers for centuries because each plant supports the others — see our companion planting chart for more pairings that work the same way.
Integrate Rather than Segregate
In nature, everything is connected. Permaculture design mimics this by placing elements so they support each other. Chickens in the garden eat pests and fertilize the soil. Fruit trees shade heat-sensitive crops underneath. A pond attracts beneficial insects that pollinate your vegetables. When each element serves multiple functions and connects to others, the whole system becomes more resilient than its individual parts.
Use Small and Slow Solutions
Big projects often have unintended consequences. Permaculture encourages starting small, observing the results, and scaling up gradually. Plant a few raised garden beds before converting your whole yard. Try one new technique per season rather than overhauling everything at once. Patience is a core skill in permaculture.
Use Edge Effects
The edges where two ecosystems meet (forest and meadow, land and water, sun and shade) are among the most productive zones in nature. They host more species and more activity than the interior of either system. In permaculture design, you can maximize these edges by creating curved garden beds instead of straight rows, building ponds with irregular shorelines, and planting hedgerows along property boundaries.
Use Biological Resources
Wherever possible, use living systems instead of synthetic inputs. Homemade compost instead of chemical fertilizer. Ducks instead of slug pellets. Nitrogen-fixing cover crops instead of synthetic nitrogen. Biological resources are renewable, self-replicating, and build ecosystem health over time rather than degrading it.
The Five Zones of Permaculture
One of the most practical tools in permaculture design is the zone system. Zones organize your land based on how often you need to visit and interact with each area. Elements that need daily attention go close to the house; those that need little or no maintenance go furthest away. This saves energy, time, and frustration.
Zone 0: The Home
Zone 0 is the house itself, including energy efficiency, water conservation, and waste reduction within the living space. Decisions here (like placing windows for passive solar heating or setting up a kitchen composting station) ripple out into every other zone.
Zone 1: The Kitchen Garden
The area immediately around your home. This is where you put things you interact with daily: herb gardens, salad greens, a small chicken coop for eggs, a worm bin, and seedling nurseries. If you only have a small backyard, Zone 1 might be your entire permaculture system.
Zone 2: The Orchard and Perennials
Semi-intensively managed areas that you visit every few days. Fruit trees, berry bushes, larger vegetable beds, beehives, and small livestock pens typically live here. A proper irrigation system helps keep maintenance manageable in this zone.
Zone 3: The Farm
The main production area for field crops, larger livestock, and staple foods. This zone is managed but less intensively, with visits weekly or as needed. Cover crops, crop rotation, and mulching reduce the need for constant attention. If you are growing profitable crops at any scale, they likely live in Zone 3.
Zone 4: Woodland and Forage
A semi-wild area used for timber, firewood, wild foraging, and free-range grazing. You visit occasionally to harvest or do light management, but the system is mostly self-sustaining.
Zone 5: Wilderness
Completely unmanaged natural area. Zone 5 exists for observation and learning. It is your reference ecosystem, the place where you watch how nature solves problems so you can apply those lessons back in Zones 1 through 4.
Key Permaculture Techniques
Beyond the principles and zones, permaculture uses several specific techniques that you can start applying right away on your farm or in your garden.
Food Forests
A food forest mimics the structure of a natural woodland using seven layers of edible plants: canopy trees (like walnuts or chestnuts), understory trees (like apples or plums), shrubs (like blueberries or currants), herbaceous plants (like comfrey or rhubarb), ground covers (like strawberries or clover), vines (like grapes or kiwi), and root crops (like garlic or potatoes). Once established, a food forest produces food year after year with minimal maintenance.
Plant Guilds
A guild is a group of plants deliberately placed together because they help each other thrive. A classic example is the apple tree guild: the apple tree provides the canopy, comfrey planted beneath it mines deep nutrients and provides mulch when cut, nasturtiums attract beneficial insects, garlic chives repel pests, and clover fixes nitrogen into the soil. Each plant has a job, and together they outperform any single plant growing alone.
Swales and Water Harvesting
A swale is a shallow trench dug along the contour of a slope with a raised berm on the downhill side. When it rains, the swale catches runoff and holds it, allowing the water to slowly soak into the soil rather than washing away. Trees and shrubs planted on the berm benefit from this stored moisture. Over time, swales can make land drought-resistant without any irrigation infrastructure. Combined with rain barrels and roof catchment, water harvesting can dramatically reduce your dependence on external water sources.
Sheet Mulching
Also called lasagna gardening, sheet mulching is a no-dig method for building fertile soil on top of existing ground (even a lawn). You layer cardboard or newspaper over the ground to suppress weeds, then pile on alternating layers of compost, manure, straw, leaves, and other organic matter. Within a few months, you have rich, plantable soil without ever touching a rototiller. It is one of the fastest ways to convert unused land into productive garden space.
Benefits of Permaculture
Why go through the effort of designing a permaculture system when you could just plant a regular garden? Because the returns compound over time in ways that conventional gardening cannot match.
Less work over time. Permaculture systems are front-loaded: you invest more effort in the design and setup phase, but once established, they require far less ongoing maintenance than conventional gardens. Perennial plants, self-seeding annuals, and natural pest control all reduce the amount of weekly labor.
Better soil health. Research shows permaculture sites have significantly higher soil carbon, lower compaction, and dramatically more earthworm activity. Healthy soil means healthier plants, better water retention, and fewer pest problems.
Water efficiency. Between swales, mulching, and strategic plant placement, permaculture systems can reduce water usage by 30% or more compared to conventional approaches. In drought-prone areas, this can be the difference between a harvest and a failed season.
Biodiversity. The multi-layered planting approach supports far more species of plants, insects, and birds than monoculture farming. That biodiversity is not just good for the environment; it actively protects your crops by maintaining natural pest predators and pollinators.
Resilience. Diverse systems are harder to knock out. If one crop fails, others pick up the slack. If pests target one species, their predators (supported by the broader ecosystem) help keep populations in check.
Lower costs. By producing your own compost, saving seeds, harvesting rainwater, and relying on biological pest control, you dramatically reduce the need for purchased inputs over time.
How to Start a Permaculture Garden
Ready to put these ideas into practice? You do not need a lot of land or money to get started. Here is a step-by-step approach that works whether you have a small backyard or several acres.
Organic matter: wood chips, leaves, straw, or green manure crops
A mix of perennial and annual seeds or seedlings
Cardboard or newspaper for sheet mulching
Step 1: Observe Your Site
Spend at least one full season watching your land before you make permanent changes. Map where sunlight falls at different times of day, where water collects or drains, which direction the prevailing wind comes from, and where frost sits longest. Take notes and sketch a rough site map. This observation period is the single most valuable step in the entire process.
Step 2: Set Goals and Create a Design
Decide what you want from your permaculture system. Food production? Wildlife habitat? Both? Then sketch a zone map of your property, placing the most labor-intensive elements (herb garden, salad beds, compost bin) closest to the house and lower-maintenance elements further out. Your design does not need to be perfect. Start with the broad strokes and refine as you learn.
Step 3: Build Your Soil
Healthy soil is the engine of any permaculture system. Start by sheet mulching your planting areas: lay cardboard over existing grass or weeds, then pile on 6 to 12 inches of organic matter (compost, aged manure, leaf mold, straw). This smothers weeds, feeds soil biology, and creates a rich planting medium without any digging. You can also make your own fertilizer from kitchen scraps and garden waste.
Step 4: Choose Your Plants
Select a mix of perennials (fruit trees, berry bushes, herbs) and annuals (vegetables, salad greens) suited to your climate zone. Think in guilds rather than rows: group plants that benefit each other and fill different layers of the canopy. Check our guide to optimizing seeds for different seasons for help with timing.
Step 5: Maintain and Adapt
Permaculture gardens need less maintenance than conventional gardens, but they are not zero-effort. Water regularly during establishment, keep mulch topped up, and observe what is working and what is not. The first year or two will involve the most hands-on time. After that, your system starts doing more of the work for you as perennials mature and soil biology builds.
Permaculture is not a rigid set of rules. It is a way of thinking about land, food, and resources that works with natural systems instead of against them. The principles are universal, but every permaculture design is unique because every site, climate, and set of goals is different.
If you are just getting started, focus on the basics: observe your land, build your soil, plant diverse species, and start small. A single well-designed garden bed using permaculture principles will teach you more than any book. From there, you can expand zone by zone as your confidence and your soil grow together.
Permaculture is a design system for creating agricultural ecosystems that are sustainable and self-sufficient. It is founded on ecological principles and strives to develop productive, effective, and resilient systems. The objective is to satisfy human needs while protecting and regenerating the natural world. Permaculture design principles can be applied to all aspects of human habitation, including food production, housing, energy consumption, waste management, and economic systems.
What is an example of permaculture?
Common examples include food forests with multiple layers of edible plants, backyard gardens using companion planting guilds, rainwater harvesting with swales and rain barrels, sheet mulching to build soil without digging, and integrating chickens into garden systems for pest control and fertilization.
What are the five zones in permaculture?
Permaculture uses six zones (0 through 5) organized by how often you interact with each area. Zone 0 is the home. Zone 1 is the kitchen garden right outside your door. Zone 2 is the orchard and perennial area. Zone 3 is the main farming zone. Zone 4 is semi-wild woodland for foraging and timber. Zone 5 is unmanaged wilderness kept for observation and learning.
What is the difference between agriculture and permaculture?
In conventional agriculture, the land is managed primarily to maximize crop yield using monocultures, heavy machinery, and chemical inputs. Permaculture takes a more holistic approach, designing diverse ecosystems that produce food while regenerating soil, conserving water, and supporting biodiversity. The key difference is that permaculture works with natural patterns rather than overriding them.
How do I start a permaculture garden from scratch?
Start by observing your site for at least one season to understand sun, water, wind, and frost patterns. Then create a simple zone map and design. Build your soil using sheet mulching (cardboard topped with layers of compost and organic matter). Choose a mix of perennial and annual plants suited to your climate, and group them in companion planting guilds. Start small and expand as you learn what works on your land.
How do I turn my lawn into a permaculture garden?
The easiest method is sheet mulching. Lay overlapping cardboard directly on your lawn (no need to remove the grass), then pile on 6 to 12 inches of compost, aged manure, straw, and leaf mold. Within a few months the grass underneath will decompose, leaving you with rich, plantable soil. From there, plant a mix of food-producing perennials and annuals arranged in guilds.
How much does it cost to start a permaculture farm?
Costs vary widely depending on scale. A backyard permaculture garden can be started for under $200 using free cardboard, homemade compost, and seed-saved plants. A larger homestead-scale setup with fruit trees, irrigation, and fencing might run $2,000 to $10,000. Commercial permaculture farms require significantly more investment for land preparation, planting stock, and infrastructure. The good news is that ongoing costs drop substantially once the system is established, since permaculture reduces the need for purchased inputs over time.
Related: Permaculture polycultures overlap heavily with multiple cropping and intercropping – both systems aim to stack more output onto the same piece of land.
Planting trees for firewood is one of the most patient, far-sighted things a homesteader can do. You’re making a decision today that will heat your home five, ten, or twenty years from now — and if you choose the right species and manage them well, you’re creating a renewable fuel supply that replenishes itself indefinitely. Think of it as planting a future woodpile. If you have land as part of your homesteading setup, dedicating even a small section to firewood trees is one of the smartest long-term investments you can make.
The concept is called a firewood rotation: you plant trees in phases so that as one group reaches harvestable size, another is already growing behind it. A well-managed woodlot can supply your full heating needs indefinitely, with nothing more than chainsaw fuel and physical labor as ongoing inputs.
In this guide we cover the best trees to grow for firewood on a US homestead — from slow-burning oak to fast-payoff black locust — along with a BTU comparison table, planting tips, and a breakdown of how much firewood a typical home actually needs.
Building a pond on your farm is a great way to provide water for livestock and crops, and it can also be a beautiful addition to your property — and a feature that enhances the wider home and garden space around your farm. There are a few things to consider before you begin to build a farm pond, such as the size and location of your pond, as well as the type of liner you will use.
Future pond owners need to get the basics right around their pond site in regards to wildlife habitat, pond liner, soil erosion, and water quality to not go down a route of poor farming practices.
Here are some tips on how to build a pond on your farm and what to think about before you get started.
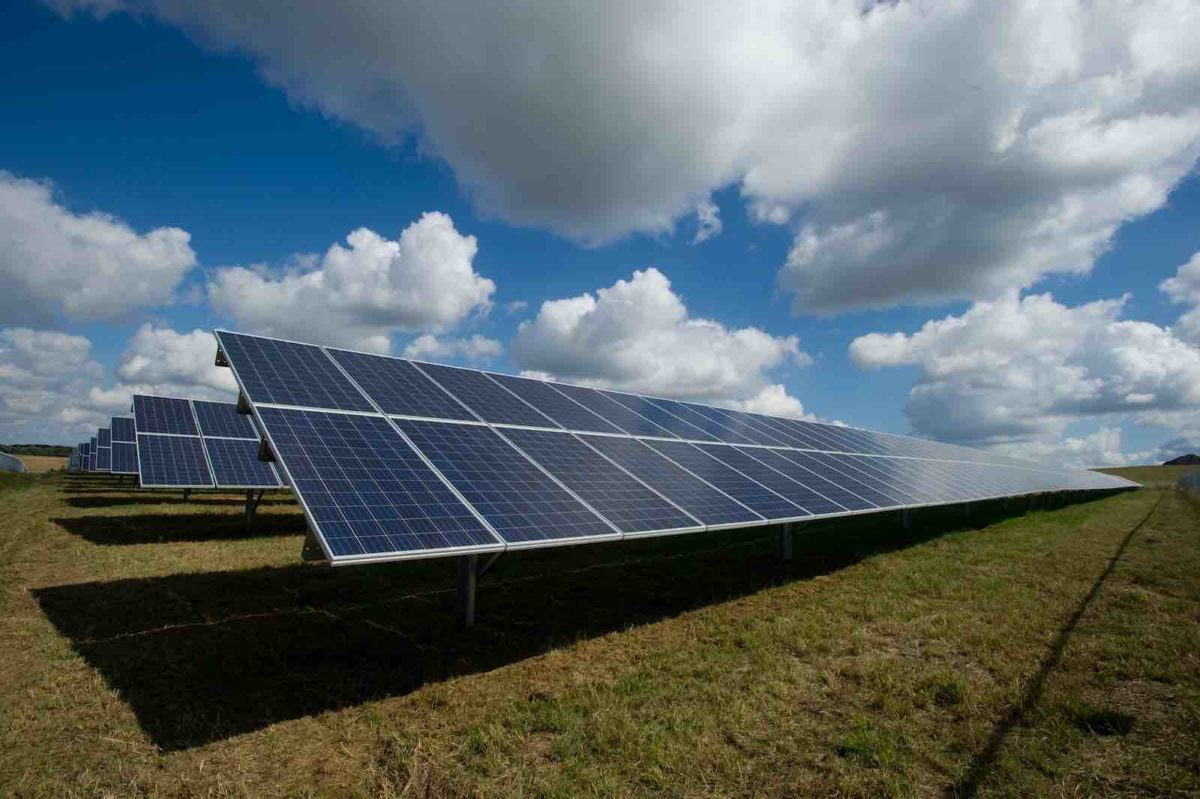
Energy costs are one of the largest operating expenses on a working farm. Between powering irrigation pumps, grain dryers, lighting, cold storage, and livestock water systems, a farm’s electricity bill can run $100–$200 per month for a modest operation, and considerably more for larger acreage. Solar panels for farmers offer a way to cut those costs dramatically — often by 50–90% — while improving energy independence and taking advantage of some of the best federal incentives currently available.
This guide covers everything from installation types and costs to USDA grants, payback timelines, and the practical steps for getting started. Whether you’re running a small homestead or managing dozens of acres, there’s a solar setup that can work for your farm.
Why Farmers Are Going Solar
The economics of farm solar have shifted dramatically in the past decade. Panel costs have dropped by more than 80% since 2010, federal tax incentives remain at historic highs, and USDA grant programs now cover up to half the cost of installation for eligible farmers. The result: payback periods that once stretched to 15–20 years now commonly run 6–10 years — leaving two full decades of near-free electricity production over a typical 30-year panel lifespan.
The average US farm spends between $100 and $200 per month on electricity for basic operations, and that figure climbs quickly for operations running heavy equipment like grain dryers, irrigation pumps, or refrigerated storage. A well-sized solar system can eliminate most or all of that expense.
Beyond the bill savings, grid independence matters. Power outages during critical windows — a late frost when heat lamps are running, or a summer afternoon when irrigation pumps need to be at full capacity — can cost more than an entire year of electricity bills. A solar-plus-battery setup insulates the farm from those risks.
Farmers are also increasingly drawn to solar for its alignment with the broader values of sustainable land stewardship — the same organic farming approach that prioritizes reducing inputs and working with natural systems rather than against them.
Why solar energy is a good choice for farmers
There are a few core reasons why solar energy suits agricultural operations particularly well.
First, solar energy is reliable. You can count on sunlight in some regard every day, which makes it a very dependable source of energy — especially in the high-sun summer months when farm energy demand peaks.
Second, solar energy is affordable. Once the panels are installed, the energy they produce is effectively free. This makes solar a very cost-effective choice for powering your farm over the long run.
Third, solar energy is sustainable. As a renewable resource, it can be used indefinitely without depleting any inputs — a natural fit for farming operations that are already focused on long-term land health.
Finally, solar energy is environmentally friendly. Solar panels produce no emissions during operation, which benefits both the local environment and the farm’s carbon footprint.
How solar energy can help your farm
Solar energy can be put to work across the entire operation. It can power farm buildings and equipment, run solar-powered irrigation pumps, supply heat and light for livestock facilities, and generate excess power that can be sold back to the grid through net metering programs.
What installing solar panels does for your farm
You can use the solar energy harvested to power your buildings and technology
You can use solar energy to power irrigation pumps and reduce water system operating costs
Solar energy creates renewable energy — great for the environment and your long-term costs
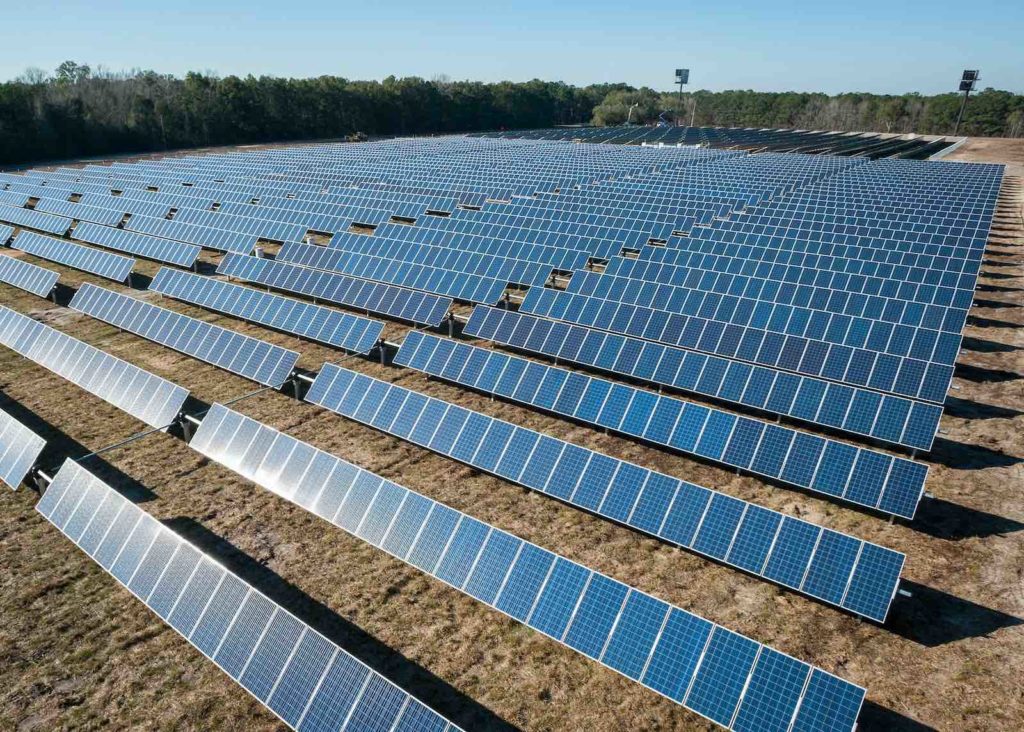
Types of Solar Installations for Farms
Not all farm solar installations look the same. The right setup depends on your available space, your primary energy needs, and whether you want to integrate solar into your existing farming activity or dedicate land to it.
Rooftop solar (barn or shed). Mounting panels on an existing barn, equipment shed, or grain storage roof is the most space-efficient option. It uses structures you already own, doesn’t consume any additional land, and keeps the array protected. Barn roofs typically face south and have generous square footage — a 40×80 ft barn roof can support a 20–25 kW system, enough to offset a substantial portion of most farm energy budgets.
Ground-mount systems. For farms with open south-facing fields and no suitable roof space, ground-mounted arrays on racking systems are a popular choice. They can be oriented at the optimal angle for maximum production and are easier to access for cleaning and maintenance. The tradeoff is land use — a 25 kW ground-mount array requires roughly 2,500–3,000 square feet.
Agrivoltaics. Agrivoltaics — also called “dual-use solar” — places panels above crops at a height that allows farming to continue underneath. Research has shown that certain crops (lettuce, herbs, shade-tolerant vegetables) actually perform as well or better under elevated panels because the shade reduces heat stress and water demand. This approach lets farmers generate solar income while continuing to produce food on the same land.
Solar water pumping systems. Standalone solar pump systems are one of the most cost-effective uses of solar on a farm. A dedicated photovoltaic panel array powers a pump directly — no grid connection, no generator, no fuel cost. These are particularly practical for remote stock water points, irrigation ponds, and well pumps in areas without easy grid access.
USDA and Federal Incentives for Farm Solar
US farmers have access to some of the best solar incentives in the world. Stacking federal grants, tax credits, and state programs can dramatically reduce the net cost of a solar installation.
REAP (Rural Energy for America Program). The USDA’s REAP program is the flagship grant for farm solar. It covers up to 50% of eligible project costs for agricultural producers and rural small businesses. In recent years REAP has been significantly expanded under the Inflation Reduction Act, with more funding and simplified applications. Grant amounts range from $2,500 to $1 million for solar projects. Applications are accepted on a rolling basis through your local USDA Rural Development office.
Investment Tax Credit (ITC). The federal ITC currently provides a 30% tax credit on the full installed cost of a solar system for businesses, including farms. For a $40,000 system, that’s $12,000 directly off your tax bill — not just a deduction, but a credit. Farm LLCs and sole proprietors can both claim it on Schedule F.
Bonus depreciation / MACRS. Commercial solar systems qualify for 5-year accelerated depreciation under MACRS (Modified Accelerated Cost Recovery System), plus 60% bonus depreciation in 2024. Combined with the ITC, a farmer in a meaningful tax bracket can recover 60–70% of system cost in the first year through credits and depreciation alone.
Net metering. Most states require utilities to credit farmers for excess solar electricity sent to the grid. Net metering effectively turns your meter backward when you’re producing more than you consume, further shortening the payback period.
State-level rebates and programs. Many states offer additional incentives — property tax exemptions for solar systems, sales tax exemptions on equipment, and utility rebate programs. Check your state’s energy office or the DSIRE database (dsireusa.org) for a full list of what’s available in your area.
How Much Does a Farm Solar System Cost?
Installed solar costs for farm systems typically range from $2.50 to $4.00 per watt, depending on system size, equipment choices, mounting type, and local labor rates. Larger systems cost less per watt than smaller ones due to economies of scale.
Here’s how that translates to typical farm system sizes before incentives:
10 kW system (small homestead or market garden): $25,000–$40,000 installed. After 30% ITC: ~$17,500–$28,000.
25 kW system (mid-size farm): $62,500–$100,000 installed. After ITC + REAP grant (if approved): potentially under $35,000 net.
50 kW system (larger operation): $125,000–$200,000 installed. After incentives, net cost could be $60,000–$80,000 or less.
The cost of solar panel systems has been falling consistently and is expected to continue declining. The lifespan of a quality solar system is approximately 25–30 years, and most panels carry 25-year performance warranties.
How much farmland will solar panels take up?
Solar panels don’t take up a lot of space when mounted on existing rooftops. For ground-mount systems, a 10–15 kW array typically requires 1,000–1,500 square feet of land. Most small to mid-size farms can accommodate this easily on non-productive areas — fence lines, odd corners, or areas near buildings.
To determine your panel count, multiply your farm’s hourly energy requirement by peak sunlight hours for your area and divide by panel wattage. Use both a low-wattage (150 W) and high-wattage (370 W) example to get a planning range.
Buying vs. leasing solar panels
Buying outright (or financing with a solar loan) gives you access to the full ITC and depreciation benefits and results in the largest long-term savings. Leasing or a Power Purchase Agreement (PPA) requires no upfront capital but typically doesn’t qualify for the ITC — the leasing company claims that instead. For most farms with any tax liability, ownership delivers better returns over a 15–20 year horizon.
Powering Farm Equipment with Solar
One of the most practical arguments for solar on a working farm is its ability to offset the highest-energy operations. Here’s where solar dollars go furthest:
Irrigation pumps. Pumping water is the single largest electricity draw on many farms. A dedicated solar array powering well pumps or pond pumps can eliminate that cost entirely. For remote water points, a standalone solar pump system with no grid connection is often the simplest and cheapest solution. See the complete guide to farm irrigation systems for more on pump sizing.
Grain dryers. On grain farms, harvest-season drying is an enormous energy expense. Solar doesn’t fully power high-BTU propane dryers, but it can offset the electrical components — fans, conveyors, controls — and in some setups supply electricity to electric heat pump dryers.
Livestock water heaters. Keeping stock tanks from freezing in winter is a constant energy drain. Solar-charged battery systems can power immersion heaters or recirculation pumps that prevent freezing without running grid power to remote pastures.
Farm lighting. Barn lighting, security lighting, and poultry lighting (which can run 14–16 hours a day for laying hens) are ideal solar loads — predictable, consistent, and easy to automate.
Cold storage. Refrigerated storage for vegetables, dairy, and meat is one of the largest continuous loads on a small farm. Pairing a cold room with a solar-plus-battery system allows pre-cooling during daylight hours, reducing peak demand charges and grid dependence.
Solar vs. Grid Power for Farmers: A Comparison
Factor
Grid Power
Solar Power
Monthly energy cost
$100–$400+ depending on usage
Near $0 after payback period
Reliability
Vulnerable to outages and rate increases
Stable; battery backup option available
Setup cost
None (already connected)
$10,000–$200,000 depending on scale
Payback period
N/A
Typically 6–10 years with incentives
Maintenance
None (utility responsibility)
Minimal — panel cleaning, annual inspection
Environmental impact
Dependent on grid mix (often fossil fuels)
Zero emissions during operation
Income potential
None
Net metering credits; potential REAP grant
Solar power vs. grid power comparison for US farm operations
The benefits of on-grid vs off-grid solar power for your farm
There are two main types of solar power: on-grid and off-grid. On-grid solar is connected to the electricity grid, while off-grid solar is not.
Which type will benefit your farm depends on factors like how much energy you need, whether grid power is already available, and what your state’s net metering policy looks like.
On-grid solar is a great choice for farms that need to generate a lot of energy. When your farm is connected to the electricity grid, you can sell any excess energy you produce back to the grid through net metering, which can reduce your electric bill to near zero and even create a small income stream.
Off-grid solar is a good choice for farms in remote areas where grid connection is impractical or expensive. Off-grid systems almost always include a battery bank to store energy for nighttime and overcast days. The key consideration is ensuring the system is sized to generate enough electricity to meet the farm’s needs through the lowest-sun winter months.
If you’re more interested in going off-grid than installing a solar system for your farm, read this incredible guide by Zoe: Living off grid in homestead
How to choose the right solar system for your farm
When choosing a solar system for your farm, there are a few key questions to work through.
The first is how much energy you need. Review past utility bills to understand your monthly and seasonal usage. Size your system to cover your highest-use months — typically summer for irrigation-heavy operations, or winter for livestock facilities.
The second is the quality of sunlight your farm receives. Peak sun hours vary significantly by geography — Arizona farms may see 6–7 peak sun hours per day, while farms in the Pacific Northwest average closer to 3–4. Your installer should use local solar irradiance data to calculate system output accurately.
The last thing to consider is your budget — and whether you plan to pursue REAP or other grants, since these can dramatically change what’s affordable. Always get multiple installer quotes and ask each one to model your projected return after all applicable incentives.
Yes. The land will be fully farmable once the solar panels are removed. Ground-mount racking systems use driven posts that leave minimal disturbance when removed, and the soil beneath panels is often in excellent condition — protected from compaction and benefiting from the organic matter that accumulates in the shaded zone.
Will Solar Panels Contaminate My Soil?
No. Solar panels do not contaminate soil. Modern panels are glass, aluminum, and silicon — inert materials with no leaching risk under normal conditions. The shaded area underneath ground-mount panels can actually build organic matter more quickly, improving soil health over time.
Can I grow crops under solar panels?
Yes — this is the principle behind agrivoltaics. Shade-tolerant crops like lettuce, spinach, herbs, and some root vegetables can perform well or even better under elevated panels. You may need to adjust your irrigation approach since the panels intercept some rainfall; a drip irrigation system works particularly well in agrivoltaic setups.
Are Animals Affected By Solar Panels?
No. Solar panels produce no noise, no radiation, and no harmful emissions. Sheep and goats are commonly grazed under ground-mount solar arrays — they keep the vegetation down and the panels clean, while benefiting from the shade. It’s one of the more practical dual-use arrangements in farm solar.
Do you need planning permission for solar panels on a farm?
In the US, solar panel installations on farm buildings typically fall under standard building permit requirements rather than special agricultural land-use permits. Requirements vary by county and state. Always check with your local building department and zoning office before installation — the process is usually straightforward and most installers will handle permit applications as part of their service.
How to maintain your solar panels
Once your solar panel system is installed, maintenance is minimal compared to most farm equipment. The main tasks are cleaning the panels periodically to remove dust, pollen, and bird droppings (a hose-down a few times a year is usually sufficient), and having an annual inspection of the inverter, wiring, and mounting hardware.
You can hire a professional for cleaning and maintenance, or handle it yourself if you’re comfortable working at height. Keep a record of monthly production output — a sudden drop in output that doesn’t correspond to weather is usually the first sign of a failing inverter or a shading issue that needs attention.
The main pros and cons of installing solar panels on your farm
Pros
Dramatically reduces or eliminates electricity bills
Access to REAP grants (up to 50% of cost) and 30% ITC
Reliable — no fuel costs, no supply chain risk
25–30 year system lifespan
Environmentally friendly — zero emissions during operation
Cons
Significant upfront capital cost
Ground-mount systems consume land that could otherwise be farmed
Output varies seasonally and requires battery storage for 24-hour reliability
How to Get Started with Farm Solar
Getting a solar system installed doesn’t have to be complicated. Most farmers find the process straightforward once they know the steps.
Energy audit. Review 12 months of electricity bills to understand your consumption patterns by season. Identify your largest loads — irrigation pumps, refrigeration, lighting — and decide which you want solar to cover.
Site assessment. Evaluate available roof space on barns and sheds (south-facing roof is ideal), any open ground suitable for a ground-mount array, and the quality of solar access (shading from trees, buildings, hills).
Installer quotes. Get at least three quotes from certified solar installers. Ask each one to model the system with and without REAP, ITC, and state incentives applied, and to show projected annual production and payback timeline.
Apply for REAP. If you’re eligible (agricultural producer or rural small business), submit a REAP application through your USDA Rural Development office before committing to an installer. REAP applications can be submitted before or after contractor selection, but approval takes time, so start early.
Permits and interconnection. Your installer should handle building permits and the utility interconnection application for grid-tied systems. Allow 4–12 weeks for utility approval depending on your provider.
Installation. A typical farm solar installation takes 1–3 days for rooftop systems, and 3–7 days for larger ground-mount arrays. Minimal disruption to farm operations.
Monitoring. Most inverters include an app or web dashboard that shows real-time and historical production. Set up monitoring before your installer leaves — it’s the best way to catch any issues early.
Solar farms and solar parks: Is this an option to explore?
Yes, solar farms and solar parks are worth exploring for farmers with large acreage and favorable grid connection costs. A solar farm is a large-scale solar power plant — rows of panels generating electricity primarily for export to the grid rather than on-site use. A solar park is a designated area set aside for solar energy development.
How much land is needed for a solar farm?
A utility-scale solar farm typically requires at least 10 acres. The main difference between a farm-scale solar installation and a utility solar farm is purpose: a farm solar system is sized to meet the farm’s own needs, while a solar farm is sized for maximum generation and grid export. Some farmers lease portions of their land to solar developers as a reliable income stream.
Advantages and disadvantages of solar farms
The main advantages are a renewable income stream from land lease payments, reduced pressure to farm every acre productively, and a strong environmental contribution. The main disadvantage is land commitment — solar lease agreements often run 20–30 years, so land leased to a solar developer cannot be farmed during that period.
Conclusion
Solar panels for farmers represent one of the best-returning capital investments available to US agricultural producers right now. Between the 30% federal tax credit, USDA REAP grants covering up to 50% of project costs, accelerated depreciation, and net metering, a well-structured solar project can pay back in 6–8 years and deliver two decades of near-free electricity afterward.
Whether you start with a solar pump system for a remote irrigation point, a rooftop array on an existing barn, or a full ground-mount system tied into your main service panel — the technology is proven, the economics are compelling, and the support programs have never been more accessible. For more on running a productive, resource-efficient operation, browse the Farming hub, the Homesteading hub, and the Farm Supplies hub.
FAQ — Should I install solar panels on my farm?
How does solar power help farmers?
Solar power helps farmers by significantly reducing or eliminating electricity bills, powering irrigation pumps and farm equipment, and providing energy independence from the grid. Federal incentives like the REAP grant and Investment Tax Credit make it financially accessible for most US farm operations.
Do farmers use solar panels?
Yes, and adoption is growing rapidly. Farmers use solar panels to generate electricity for buildings, power irrigation and water pumping systems, run cold storage and lighting, and reduce dependence on grid power. Some farmers also lease land to utility-scale solar developers for additional income.
How many solar panels are needed to power a farm?
It depends on the farm’s energy consumption. A small market garden or homestead might need a 10–15 kW system (roughly 25–40 panels). A mid-size farm running irrigation, cold storage, and livestock facilities might need 25–50 kW. The best approach is to review 12 months of utility bills and have an installer size the system to your actual usage.
Can I put solar panels on agricultural land?
Yes. Solar panels can be installed on agricultural land as rooftop systems on farm buildings or as ground-mount arrays. Agrivoltaic systems allow crops to be grown underneath elevated panels simultaneously. Check your local zoning requirements before installation.
How many solar panels can fit on an acre?
A typical ground-mount solar installation fits roughly 150–200 panels per acre, depending on racking design and row spacing. That translates to approximately 50–75 kW of generating capacity per acre — enough to power a substantial farm operation from a relatively modest land footprint.
How does solar farming work?
Solar farming works by using photovoltaic panels to convert sunlight into DC electricity, which an inverter converts to AC power usable by farm equipment and buildings. Excess generation can be exported to the grid for net metering credits, or stored in batteries for use at night and during low-sun periods.
Water-hungry crops are bound to thrive when they have access to a constant water supply. Fail to provide it, and your crops are destined to struggle. That’s why farm irrigation systems have become one of the most important investments a small farm can make.
Farm irrigation systems distribute water reliably to plant roots, reducing manual labor and conserving water. Unlike the old days when farmers had to wait for rain, today’s irrigation options range from simple drip lines to solar-powered pump setups that run themselves.
This guide covers every major type of farm irrigation system, how to choose the right one for your land, water sources to consider, scheduling tips, and common mistakes to avoid.
Why Irrigation Matters on a Small Farm
Rainfall alone is rarely enough. Even in regions with moderate annual precipitation, dry spells arrive at the worst possible time — right when crops are establishing roots or filling out fruit. Water stress during critical growth windows can cut yields by 20–50%, and in severe drought years the damage can be total.
The numbers reinforce why this matters. According to the USDA, irrigated farmland in the US produces roughly 54% of the total value of crop sales while accounting for only about 20% of harvested acres. Put simply, irrigated farms are dramatically more productive per acre than rain-fed operations. That productivity gap is exactly why choosing the most profitable crops for your small farm starts with getting water right first.
Drought is also a growing concern. The US Drought Monitor regularly shows 30–40% of the contiguous US under some level of drought conditions, and western states increasingly face multi-year water deficits. Even in the traditionally wetter Southeast and Midwest, summer dry spells have become more frequent and severe.
The difference between irrigated and rain-fed farming goes beyond yield. Irrigated crops can be planted on a reliable schedule, allowing for better market timing. Consistent soil moisture also means more uniform fruit and vegetable sizing — which matters for direct sales and farmers’ market presentation. And with the right system, water can be delivered with precision, reducing disease pressure from wet foliage and lowering the risk of runoff and soil erosion.
The Different Types of Farm Irrigation Systems
Choosing the right system starts with understanding what each one does best. Here’s a detailed look at the main options available to small farm operators.
Drip / Trickle Irrigation
A drip or trickle irrigation system delivers water to plants in a slow, steady stream directly to the root zone. This type of system is often used in areas where water is scarce because it supplies water precisely where it’s needed, minimizing evaporation and surface runoff.
Drip systems can achieve water use efficiency of up to 90%, compared to 60–75% for most sprinkler systems. They work exceptionally well for vegetables, fruit trees, berry crops, and orchards — essentially any crop where you can run a dedicated line to each plant or row.
You can set up drip irrigation to run automatically via a timer, or operate it manually. For small farms and market gardens, it’s often the most practical and cost-effective long-term choice.
Quick Facts: Drip / Trickle Irrigation
Water efficiency up to 90%
Best for vegetables, orchards, and row crops
Both automatic and manual operation available
Reduces weed pressure between rows
Emitters can clog — requires filtered water and periodic maintenance
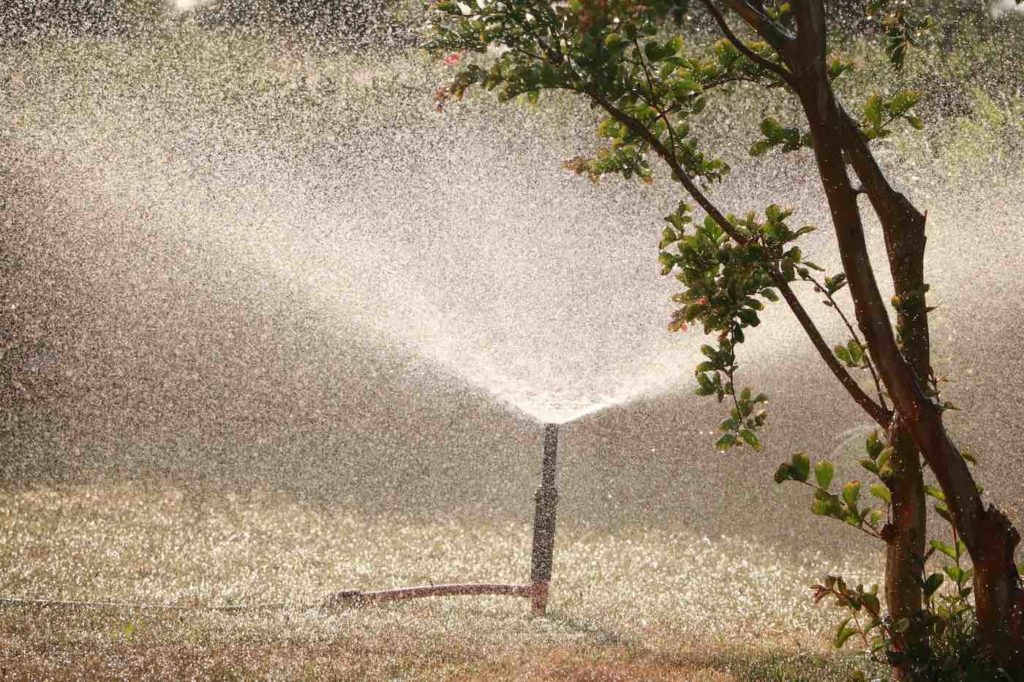
Hand-Moved Sprinkler Irrigation
The hand-moved sprinkler irrigation system uses aluminum pipe sections that can be repositioned manually. Water is drawn from a source — river, pond, or well — and distributed through sprinkler heads that cover a set radius. It’s far more effective than a hose and covers ground quickly once you get a rhythm going.
Quick Facts: Hand-Moved Sprinkler Irrigation
Great for drought-affected areas
Easily maneuverable and low cost to start
Conserves more water than flood methods
Cannot supply water directly to plant roots
Requires manual labor for repositioning
Solid Set Sprinkler Systems
A solid set sprinkler irrigation system is designed to function throughout the entire crop season without being moved. Farmers set this up once — either with portable aluminum pipe above ground or permanent underground PVC — and it stays in place, irrigating vegetable crops reliably from transplant to harvest.
Quick Facts: Solid Set Sprinkler Systems
Provides years of trouble-free operation once installed
Coverage across a wide area with no daily labor
Suitable for a wide range of agricultural crops
Higher upfront and operating costs
Requires a stable, adequate water supply
Big Gun Irrigation Systems
A big gun irrigation system uses a large-nozzle sprinkler that throws water over a wide radius — often 100 feet or more per pass. It’s popular for medium to large fields where consistent water delivery matters, especially during dry periods. Affordable to install and relatively simple to operate, big gun systems are a practical step up from hand-moved pipes for farms scaling up.
Quick Facts: Big Gun Irrigation Systems
Improves crop yields during dry spells
Covers large areas efficiently
Affordable entry point for medium farms
Requires manual repositioning or a traveling reel unit
Traveling Big Gun Sprinklers
A traveling big gun sprinkler attaches to a large water tank on wheels and self-propels across the field as it irrigates. This makes it ideal for farmers who need to cover large acreage quickly without repositioning equipment by hand. Once set at one end of the field, the machine works its way across while you focus on other tasks.
Quick Facts: Traveling Big Gun Sprinklers
Self-propelled — minimal labor once set up
Waters large areas evenly in a single pass
Maneuverable between fields
Higher capital cost than static systems
Best suited to open, rectangular fields
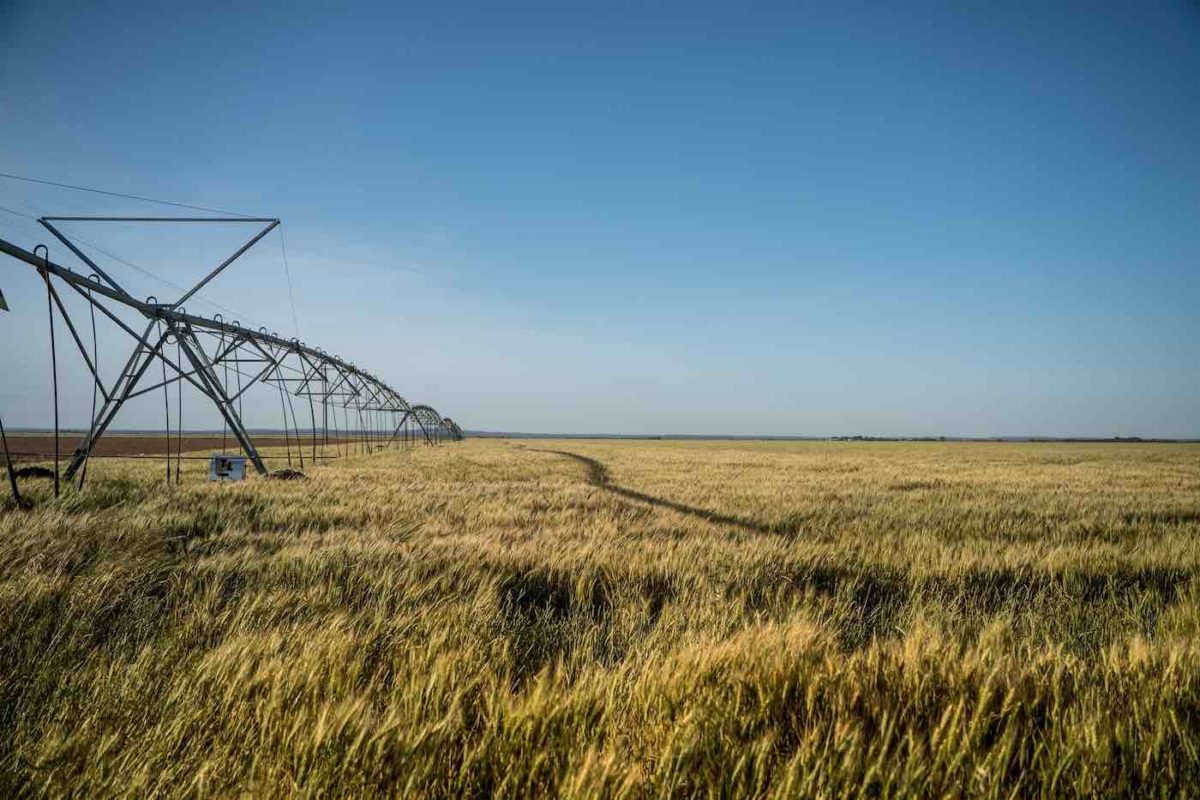
Center Pivot Irrigation Systems
A center-pivot irrigation system uses a long, rotating arm mounted on a central pivot point to deliver water in a circular pattern. Center pivot systems are a very efficient way to water crops over hundreds of acres at once. They are adaptable to a wide range of climatic conditions and soil types, and can be fitted with drip emitters for even greater efficiency.
Quick Facts: Center Pivot Irrigation Systems
Handles a wide range of weather and soil conditions
Low daily labor requirement once installed
Can be automated and monitored remotely
High initial and maintenance costs
Not suitable for irregularly shaped fields
Surface / Flood Irrigation
Surface or flood irrigation is the oldest irrigation method in the world — gravity does most of the work. Water is released at the top of a field and flows downhill through furrows or basins to reach plant roots. It’s still widely used for rice, alfalfa, and other field crops on flat terrain.
Water efficiency for flood irrigation typically sits around 60%, lower than sprinkler or drip alternatives. However, the setup cost is minimal — essentially just earthwork and gates — which makes it attractive for large-acreage operations on level ground with abundant water access.
Quick Facts: Surface / Flood Irrigation
Very low setup cost — primarily earthmoving
Best for flat fields growing rice, alfalfa, or pasture
No energy required if field has natural slope
Water efficiency around 60% — higher losses to evaporation and runoff
Not practical on sloped or uneven terrain
Subsurface Drip Irrigation
Subsurface drip irrigation (SDI) takes the efficiency of standard drip systems one step further by burying the drip lines 6–18 inches below the soil surface. With water delivered directly to the root zone and no surface wetting at all, evaporation is near zero. SDI is most commonly used in permanent crops like vineyards and orchards, or in high-value vegetable rotations.
The main tradeoff is cost and accessibility — buried lines are harder to inspect and replace, so installation quality and good filtration matter a lot. When done right, though, SDI systems often last 10–20 years with minimal upkeep.
Micro-Sprinklers for Orchards
Micro-sprinklers — sometimes called micro-jets or spinner heads — are low-volume sprinklers that wet a 6–12-foot diameter area around each tree or shrub. They’re particularly popular in orchards and vineyards because they can be used for both irrigation and frost protection: running water through micro-sprinklers on a freezing night releases latent heat as water freezes, protecting blossoms down to about 26°F.
Quick Facts: Micro-Sprinklers
Dual-purpose: irrigation and frost protection
Ideal for orchards, vineyards, and nursery stock
Low flow rates conserve water compared to standard sprinklers
Requires clean water to prevent clogging
Farm Irrigation Systems Compared
Here’s a quick side-by-side comparison to help you see where each system fits.
System Type
Best Crop Types
Water Efficiency
Setup Cost
Maintenance Level
Drip / Trickle
Vegetables, orchards, berries
Up to 90%
Low–Medium
Medium (filter cleaning, emitter checks)
Sprinkler (solid set)
Row crops, lawns, field vegetables
70–80%
Medium–High
Low–Medium
Center Pivot
Corn, wheat, soybeans, large row crops
75–85%
High
Medium (mechanical parts)
Surface / Flood
Rice, alfalfa, pasture (flat terrain)
~60%
Very Low
Low (mostly land management)
Subsurface Drip
Vineyards, orchards, high-value vegetables
90–95%
High
Low (once installed)
Micro-Sprinklers
Orchards, nurseries, frost-sensitive crops
80–90%
Medium
Low–Medium
Big Gun / Traveling Gun
Pasture, field crops, large acreage
65–75%
Medium
Low
Comparison of farm irrigation systems by crop type, efficiency, cost, and maintenance
The Best Irrigation Method for Small Farms & Hobby Farms
Small farms and hobby farms can use a wide variety of irrigation techniques. Drip irrigation, sprinkler irrigation, and micro-irrigation systems are a few common ways. For a medium-sized farm, a big gun irrigation system can also be practical.
Here’s a summary of these methods’ benefits and drawbacks for small farms or gardens:
System Name
Main Benefits
Drawbacks
Sprinkler
Best for both large and small areas; easy to operate and set up
Needs additional sprinklers for full coverage; doesn’t supply water directly to roots
Drip
Most water-efficient; supplies water to roots; automatic or manual operation
Higher upfront cost; emitters need maintenance
Micro-irrigation
Cost-effective; great for lawns, gardens, and small farms; conserves water
Slower application rate
Big gun
Maneuverable; easy setup; suitable for small and large areas
Some models require manual repositioning
Overview of different irrigation methods and their pros and cons for Small Farms & Hobby Farms
What is the most efficient watering system?
If you’re looking for the most efficient watering system, drip irrigation is hard to beat. It uses significantly less water than any other method, delivers moisture exactly where it’s needed, and can be adjusted to match the specific needs of your crops.
What is the most sustainable irrigation system?
When it comes to long-term sustainability, drip irrigation wins again. It uses less water, reduces soil erosion, minimizes water pollution from runoff, and keeps soils healthy by avoiding the compaction that heavy flooding can cause.
Choosing the Right System for Your Farm
No single irrigation system is best for every farm. The right choice depends on a combination of factors that are specific to your land, crops, and resources. Here are the key questions to work through before committing to a system.
Acreage. Small market gardens (under 2 acres) generally do well with drip tape or micro-sprinklers. Larger row crop operations of 10+ acres often point toward solid set sprinklers, traveling guns, or center pivots.
Crop type. Vegetables and fruit trees benefit most from the precision of drip irrigation. Pasture, hay, and field grains are more forgiving and work well with sprinkler or flood methods.
Water source. A gravity-fed pond or canal makes surface irrigation easy. A well or municipal connection typically requires a pump, which suits pressurized drip or sprinkler systems. See the water sources section below.
Terrain. Flat fields suit almost any system, including flood. Sloped or rolling ground rules out flood irrigation and may require pressure-compensating drip emitters to ensure even distribution.
Budget. If capital is tight, starting with drip tape on vegetable beds delivers the best return per dollar. A full solid-set sprinkler system or center pivot is a larger investment that pays off over years of operation.
Labor availability. If you’re farming with limited help, automated systems — drip on timers, solid set sprinklers — reduce daily workload. Hand-moved pipe or big gun systems require more regular human input.
Water Sources for Farm Irrigation
Every irrigation system needs a reliable water source. On a small farm, you typically have several options — and often a combination works best.
Wells. Drilled wells are the most common source for farms without surface water. Well yield (measured in gallons per minute) determines what irrigation system is feasible. A well producing 10–20 GPM can typically support drip irrigation on 2–5 acres of vegetables.
Farm ponds. A pond is an excellent gravity-fed or pump-fed reservoir for irrigation. Building a farm pond as a water source gives you stored water that can buffer dry periods and reduce dependence on wells or municipal supply.
Rivers and streams. Surface water rights vary widely by state. In the western US, water rights are strictly regulated and require permits. In the East, riparian rights generally allow reasonable use. Always confirm legal access before drawing from moving water.
Rainwater harvesting. Collecting roof runoff into cisterns or stock tanks can supplement irrigation in areas with reliable summer rainfall. It won’t replace a well or pond but helps during light dry spells and reduces pump runtime.
Municipal water. City or rural co-op water is the most reliable source but the most expensive. It works well for small market gardens where water costs are offset by high-value crops.
Some farms are also exploring solar-powered irrigation to reduce pump operating costs — pairing a solar array with a well pump or pond pump can cut irrigation energy costs significantly over a 10–15 year horizon.
Irrigation Scheduling Tips
Having the right system is only part of the equation. Knowing when and how much to water makes the difference between thriving crops and wasted water.
Water early in the morning. Watering at dawn minimizes evaporation — air temperatures are low and wind is usually calm. Water applied in the afternoon on a hot day can lose 20–30% to evaporation before it reaches the root zone.
Match frequency to crop stage. Seedlings and transplants need frequent, light watering to keep the top few inches of soil moist. Established plants benefit from deeper, less frequent irrigation that encourages deep root development.
Use a soil moisture meter. A simple tensiometer or electronic probe takes the guesswork out of when to irrigate. Aim to water when soil moisture drops to 50–60% of field capacity for most vegetables, and before plants show any visual stress.
ET-based scheduling. Evapotranspiration (ET) data — available from most state agricultural weather networks — tells you how much water crops are actually using each day. Scheduling irrigation around ET values prevents both over- and under-watering and is the method of choice for serious market growers.
Account for rainfall. Connect your irrigation timer to a rain sensor so systems automatically shut off after rain events. Overwatering after rain is one of the most common mistakes on small farms and wastes both water and energy.
Proper irrigation scheduling pairs well with a strong fertilization program — water moves nutrients into the root zone, so getting both timing and rates right maximizes results. For more on soil nutrition, see the guide to fertilizing irrigated crops.
Common Farm Irrigation Mistakes to Avoid
Even a well-designed irrigation system can underperform if it’s used incorrectly. Here are the pitfalls that catch small farm operators most often.
Overwatering. More water is rarely better. Consistently saturated soil drives out oxygen, encourages root diseases like Pythium and Phytophthora, and leaches nutrients below the root zone. Learn your soil’s water-holding capacity and respect it.
Ignoring pressure requirements. Every irrigation system has an optimal operating pressure range. Too little pressure and sprinkler heads won’t distribute evenly. Too much pressure and drip emitters blow out or mist instead of drip, losing much of the efficiency advantage. Install a pressure regulator appropriate for your system.
Skipping seasonal maintenance. Filters should be checked and cleaned regularly during the irrigation season. Drip lines need flushing at the end of each season. Sprinkler heads need clearing of debris. Neglecting maintenance leads to uneven distribution and expensive failures.
Using the wrong system for your soil type. Sandy soils drain fast and need frequent, light applications — drip systems shine here. Heavy clay soils absorb water slowly, so flood and high-rate sprinkler systems can cause pooling and runoff. Match your application rate to your soil’s infiltration rate.
No backflow prevention. Irrigation lines that connect to a well or municipal supply should always have a backflow preventer installed. Without it, fertilizer injected into the system or soil contaminants pulled in by pressure changes can enter your drinking water supply.
Watering in the evening. Night irrigation leaves foliage wet overnight, which creates ideal conditions for fungal diseases like powdery mildew and botrytis. If you must water later in the day, drip systems that keep foliage dry are the safer choice.
In Summary
Farm irrigation systems are one of the highest-impact investments a small farm can make. The right system protects yields through dry spells, conserves water, and can reduce the daily labor of hand-watering dramatically.
For most small farms and market gardens, drip irrigation offers the best combination of water efficiency, crop health, and return on investment. Larger operations growing row crops or field grains may be better served by sprinkler systems or center pivots. And on flat ground with an abundant water source, surface irrigation is still a perfectly viable and very low-cost option.
Whatever system you choose, pair it with a solid scheduling plan, keep up with maintenance, and match your water application to what your crops and soil actually need. That combination — right system, right timing, right rate — is what turns a good farm into a great one. For more resources on building a productive operation, browse the Farming hub and Homesteading hub.
Frequently Asked Questions about Farm Irrigation Systems
What are the 4 types of agricultural irrigation?
The four main types of agricultural irrigation are surface irrigation, center-pivot irrigation, sprinkler irrigation, and drip irrigation. The right irrigation system can save time, money, and water while ensuring a thriving yield.
How does a farm irrigation system work?
Most farm irrigation systems work by using a pump to draw water from a source — such as a well, river, or pond — and distributing it evenly across the field through a network of pipes, emitters, or sprinkler heads. The specific delivery method varies by system type.
What are the 5 different types of irrigation systems?
The five core irrigation systems are: drip irrigation, subsurface drip irrigation, sprinkler irrigation (including solid set and center pivot), surface/flood irrigation, and micro-irrigation. Many farms use a combination of these depending on their crops and field layout.
Which type of irrigation is best or most effective in agriculture?
Drip irrigation is widely regarded as the most efficient and effective system for agriculture. It delivers water directly to the root zone with up to 90% efficiency, reduces weed pressure, and can be automated for low-labor operation.
What do farmers use to water fields?
Farmers use a range of irrigation systems depending on their crop type, field size, and water source. Common choices include drip systems for vegetables and orchards, sprinkler systems for row crops, and flood irrigation for rice and pasture on flat terrain.