
A good chicken coop is the single most important investment you’ll make when you start keeping chickens. It’s what stands between your flock and a raccoon at 2am, what keeps them dry through a February storm, and what determines whether collecting eggs is a five-minute joy or a daily headache. This guide walks through everything that goes into building a proper chicken coop, from sizing and materials to predator-proofing, ventilation, and nesting boxes — plus a few solid ready-made options if building from scratch isn’t for you.
If you haven’t already worked out flock size, feeding, and the basics of getting started, our guide on how to get started with raising chickens covers that ground first. This article picks up where that one leaves off and goes deep on the coop itself.
How Big Should a Chicken Coop Be? Sizing by Flock Size
Before you cut a single board, work out how much space your flock actually needs. Cramming too many birds into a small coop is the number one cause of feather-pecking, stress, and disease in backyard flocks. As a rule of thumb, budget at least 4 square feet of coop floor space per standard-size bird, plus 8-10 square feet of outdoor run space per bird if they won’t be free-ranging all day.
| Flock size | Minimum coop floor space | Minimum outdoor run space |
|---|---|---|
| 3-4 chickens | 12-16 sq. ft. | 24-40 sq. ft. |
| 5-6 chickens | 20-24 sq. ft. | 40-60 sq. ft. |
| 7-10 chickens | 28-40 sq. ft. | 56-100 sq. ft. |
| 11-15 chickens | 44-60 sq. ft. | 88-150 sq. ft. |
Bantam breeds can get by with a bit less space, while heavier dual-purpose breeds like Orpingtons and Wyandottes do better with numbers on the generous end of that range. If you’re still deciding on a breed, more space rarely goes to waste — a coop that feels roomy now will still fit your flock if you add a few more birds next spring.
Materials and Location
Most DIY coops are framed with standard 2×4 lumber, sheathed with plywood or board-and-batten siding, and roofed with asphalt shingles or corrugated metal for runoff. Pressure-treated lumber for the base and skids is worth the extra cost since that’s the part sitting closest to damp ground and droppings. For the run, 1/2-inch hardware cloth is non-negotiable over any doors, windows, or vents — standard chicken wire is fine for keeping chickens in, but it won’t stop a raccoon or weasel from reaching through and grabbing a bird.
Pick a flat, well-drained spot with at least partial sun exposure. Avoid low points in your yard where water pools after rain, and keep the coop far enough from your house and any neighbors that odor and noise won’t become a problem. If you’re also planning fencing for the wider property, our overview of farm gates and fencing options covers the woven wire and post-and-rail choices that pair well with a coop run.
How to Build a Chicken Coop: Step by Step
There’s no single “correct” chicken coop plan — designs range from simple A-frame tractors you move around the yard to full walk-in sheds. But almost every build follows the same sequence. Here’s how it breaks down.
1. Frame and level the base
Dig out and level the footprint, then build a rectangular base frame from pressure-treated 2x4s or 4×4 skids. Getting this square and level now saves you from doors that won’t close and roofing that doesn’t sit flush later. Raise the floor a few inches off the ground on skids or blocks — it keeps the wood dry and gives you one more line of defense against burrowing predators.
2. Frame the walls and roof
Frame the walls with 2x4s on 16-inch centers, same as you would for a garden shed, and make sure every corner is square before you sheathe it. A simple shed roof (a single sloped panel) is the easiest for a beginner to build and sheds rain and snow well; a gable roof looks nicer and gives you more headroom but adds complexity. Whichever you choose, extend the roofline with at least a foot of overhang to keep rain off the walls and away from the run door.
3. Predator-proof every opening
This is the step most first-time builders underestimate. Raccoons, weasels, and even determined dogs will test every gap in a coop, and they only need to succeed once. Cover every window, vent, and gap with 1/2-inch hardware cloth, screwed down rather than just stapled — raccoons can pull staples out. Bury hardware cloth 6-12 inches into the ground around the perimeter of the run, or lay it flat and pin it down, to stop digging predators like foxes and dogs. Use predator-proof latches (a simple hook-and-eye isn’t enough — raccoons can work those open) and lock the coop door every night, even if nothing has bothered your flock yet.
4. Ventilation and temperature control
Chickens generate a surprising amount of moisture and ammonia from droppings and breathing, and a sealed-up coop turns damp and unhealthy fast — poor ventilation is a bigger cold-weather risk to your flock than the cold itself. Install vents high on the walls, above roost height, so fresh air circulates without creating a direct draft on sleeping birds. In summer, that same airflow keeps the coop from turning into an oven; a small solar-powered vent fan can help in hot climates. In winter, resist the urge to fully seal the coop — deep litter bedding and good ventilation do more for keeping birds warm than insulation alone, and most cold-hardy breeds handle freezing temperatures far better than a stuffy, damp coop.
5. Nesting boxes
Budget one 12x12x12-inch nesting box for every 3-4 hens — they’re happy to share, so you don’t need one box per bird. Mount boxes 18-24 inches off the floor, lower than the roosts (chickens will sleep in whichever spot is highest, and you don’t want that to be the nesting box, or you’ll be cleaning droppings out of it every morning). Add a lip on the front edge to keep bedding from spilling out, and keep the boxes dark and slightly secluded — hens prefer privacy when laying. A small hinged access door on the outside wall lets you collect eggs without stepping into the coop.
6. Roosts
Chickens sleep on roosting bars, not on the floor or in nesting boxes, so give them 8-10 inches of roost length per bird. Use a 2×4 with the wide side up (chickens grip it flat-footed more comfortably than a rounded dowel) and round off the top edges. Set roosts at least 2 feet off the ground and a foot or more below the ceiling, with the highest roost positioned above the nesting boxes so birds naturally choose it over the boxes at bedtime.
7. Build the outdoor run
The run is where your flock spends most of their waking hours, so it deserves as much care as the coop itself. Frame it with the same predator-proofing standards — hardware cloth, buried or pinned perimeter wire, and a secure, latched gate. A roof or cover over at least part of the run (hardware cloth works, or a solid panel over a portion for shade and rain cover) keeps out aerial predators like hawks, which are a real threat to free-ranging flocks in open country. If you’re considering ducks alongside or instead of chickens, note that their housing needs differ mainly around water access — see our guide to raising ducks for the details. If your run backs onto a wider fenced pasture or garden, matching it up with the right fencing and gate hardware keeps the whole property consistent instead of patching together mismatched wire.
Keeping Your Coop Clean and Comfortable
A well-built coop still needs upkeep. Deep-clean bedding every couple of months (or use the deep litter method, adding fresh straw or shavings on top and turning it over rather than fully replacing it each time), and spot-clean droppings under the roosts weekly. Keep feed and water off the coop floor to avoid attracting rodents, and consider an automatic chicken feeder if you’re often away during the day — it keeps feed cleaner and cuts down on the mess that draws pests in the first place. A clean, dry, well-ventilated coop is the biggest single factor in keeping your flock free of mites, respiratory issues, and the diseases that spread fastest in damp, crowded conditions.
Or, Buy a Ready-Made Chicken Coop Instead
Building from scratch isn’t for everyone, and that’s fine — a well-made pre-built coop will serve your flock just as well as a DIY structure, and it saves you a weekend of cutting and framing. Here are three solid options across different flock sizes and budgets.
1. Unovivy Small Wooden Chicken Coop
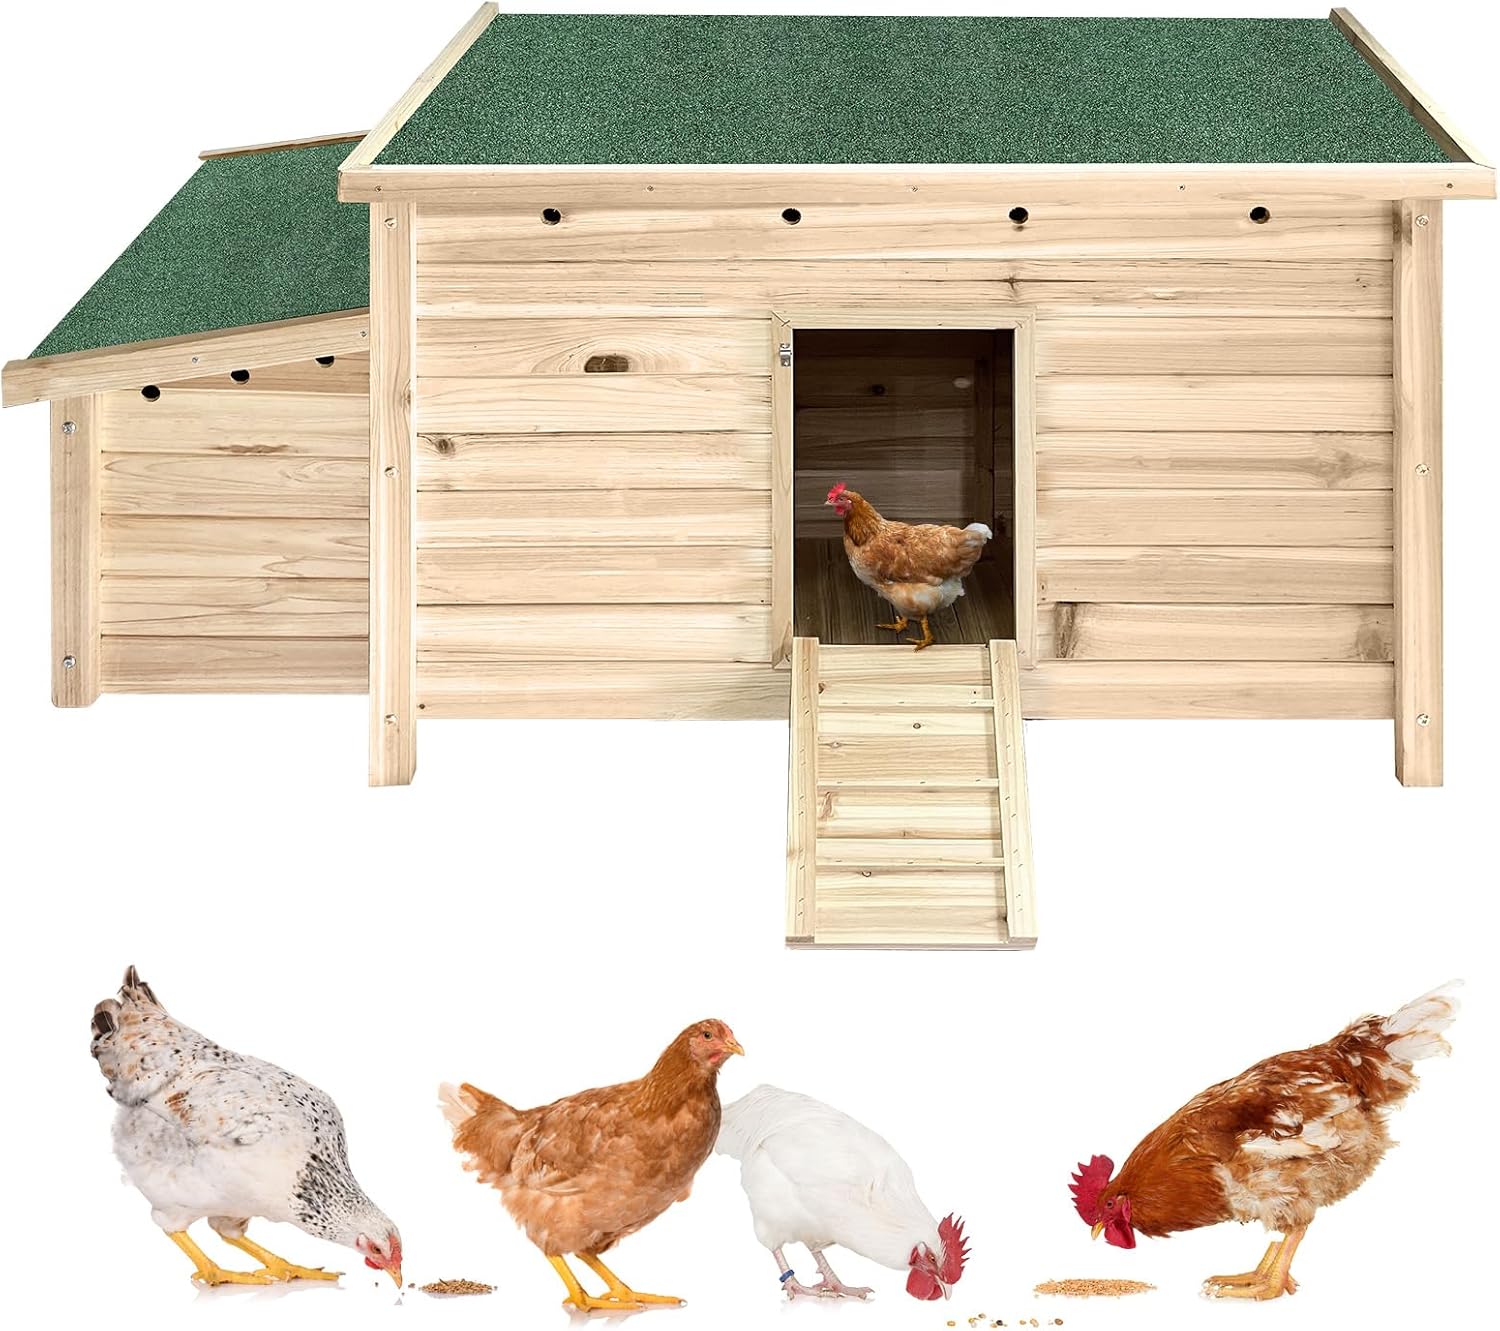
This is the coop to start with for a small backyard flock of 2-4 birds. It’s a simple fir-wood hutch with a built-in nesting box, a hinged roof panel for cleaning and egg collection, and a ramp up to a covered run underneath. It’s small enough to fit in a suburban backyard without dominating it, and light enough for one person to move if you need to shift it to a new spot on the lawn.
It’s not going to hold up to a determined predator on its own the way a hardware-cloth-wrapped DIY build would, so if raccoons or loose dogs are a known problem in your area, plan on reinforcing the run wire or keeping it inside a fenced yard. For a starter flock in a low-predator-pressure setting, though, it’s an easy, affordable way to get chickens housed without picking up a saw.
Pros of the Unovivy Coop
- Affordable entry point for a small flock
- Lightweight enough to reposition on your own
- Built-in nesting box and ramp, no extra parts to buy
Cons of the Unovivy Coop
- Only suits small flocks of 2-4 birds
- Stock wire isn’t heavy enough to stop a determined predator alone
- Wood needs a yearly sealant coat in wet climates
2. ALEKO Walk-In Metal Chicken Coop and Run
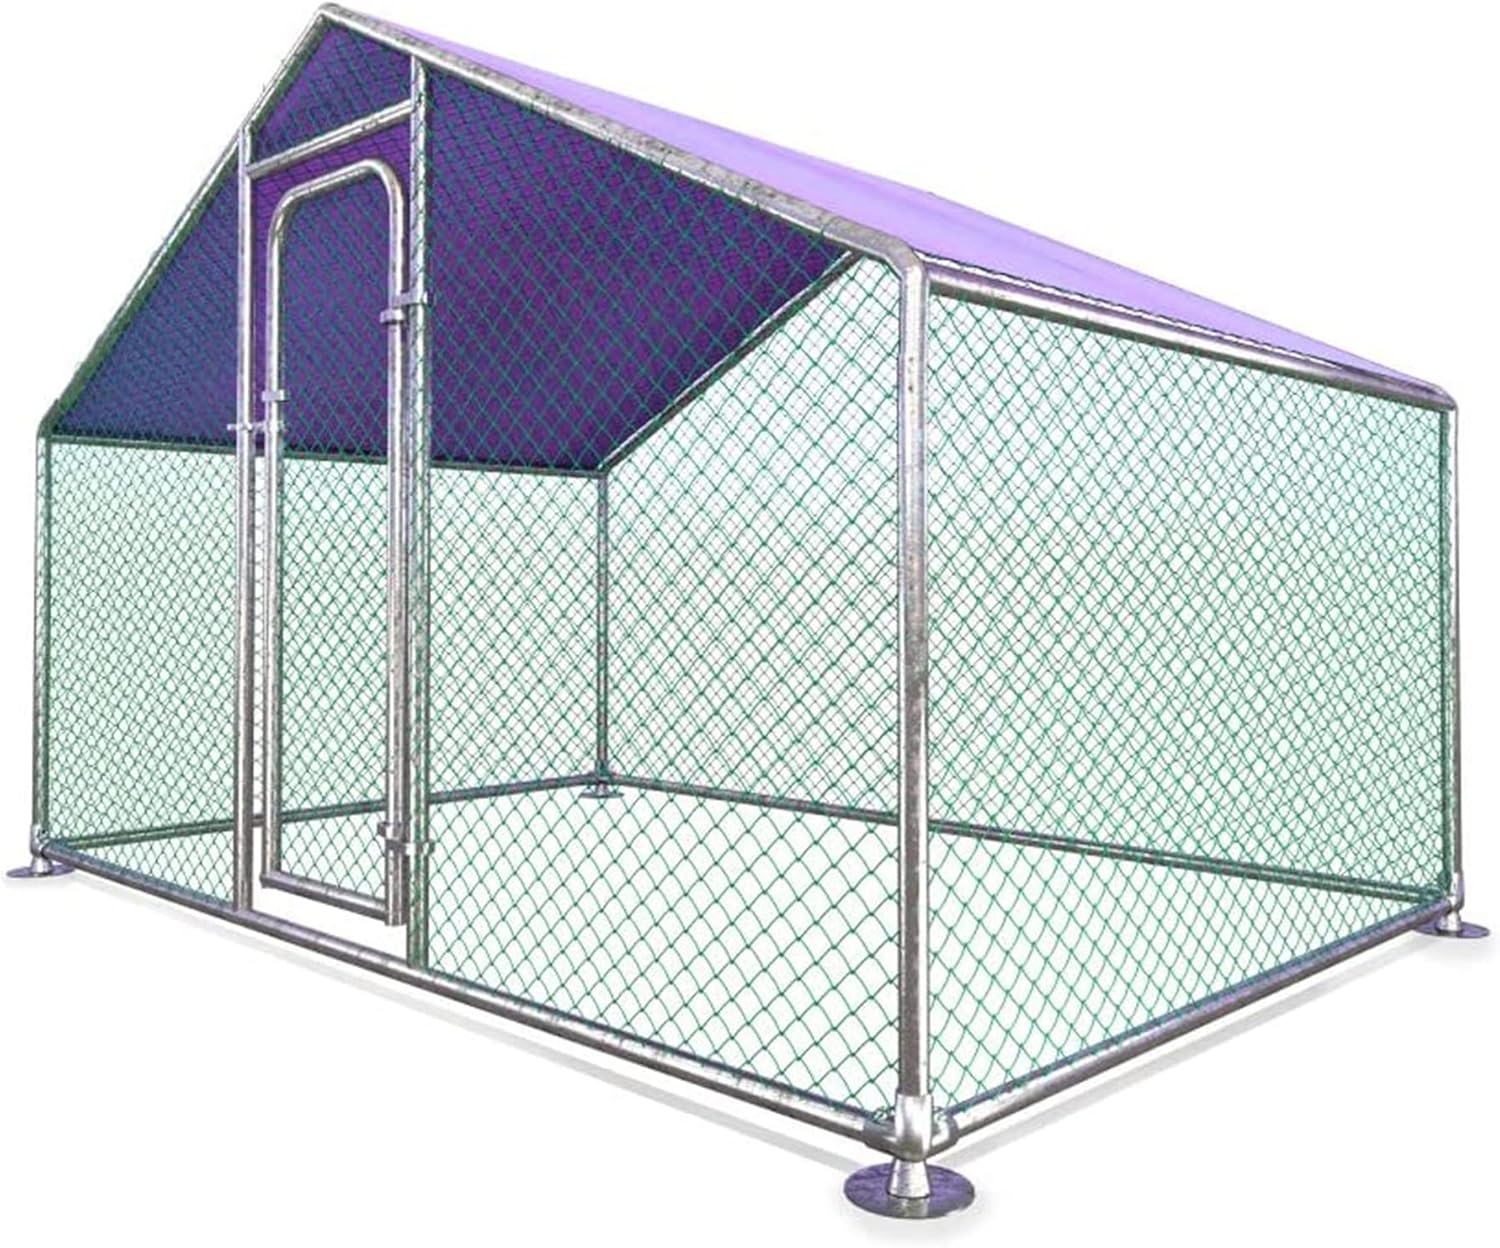
At 6.5 x 10 feet with a walk-in height, this is the mid-size option for anyone who wants real elbow room without building a shed. The galvanized steel frame and waterproof cover go up without welding or heavy tools — it’s designed to be a weekend assembly job with a screwdriver and a helper. Because you can walk in fully upright, cleaning and egg collection are a lot less awkward than with a low hutch you have to bend or crouch to reach into.
It’s sold as a run/coop combo rather than a fully enclosed henhouse, so in cold climates you’ll want to add a smaller insulated sleeping box inside for winter nights, and reinforce the base of the cover with buried hardware cloth if digging predators are active in your area. For the price, though, it’s hard to beat for the amount of usable space per dollar.
Pros of the ALEKO Walk-In Coop
- Large walk-in footprint at a budget price
- No welding, tool-light assembly
- Galvanized frame resists rust better than raw steel
Cons of the ALEKO Walk-In Coop
- Fabric cover needs a fully enclosed sleeping box added for cold winters
- Base cover benefits from extra buried wire against diggers
- Cover fabric will eventually need replacing with heavy sun exposure
3. OverEZ Classic Large Chicken Coop
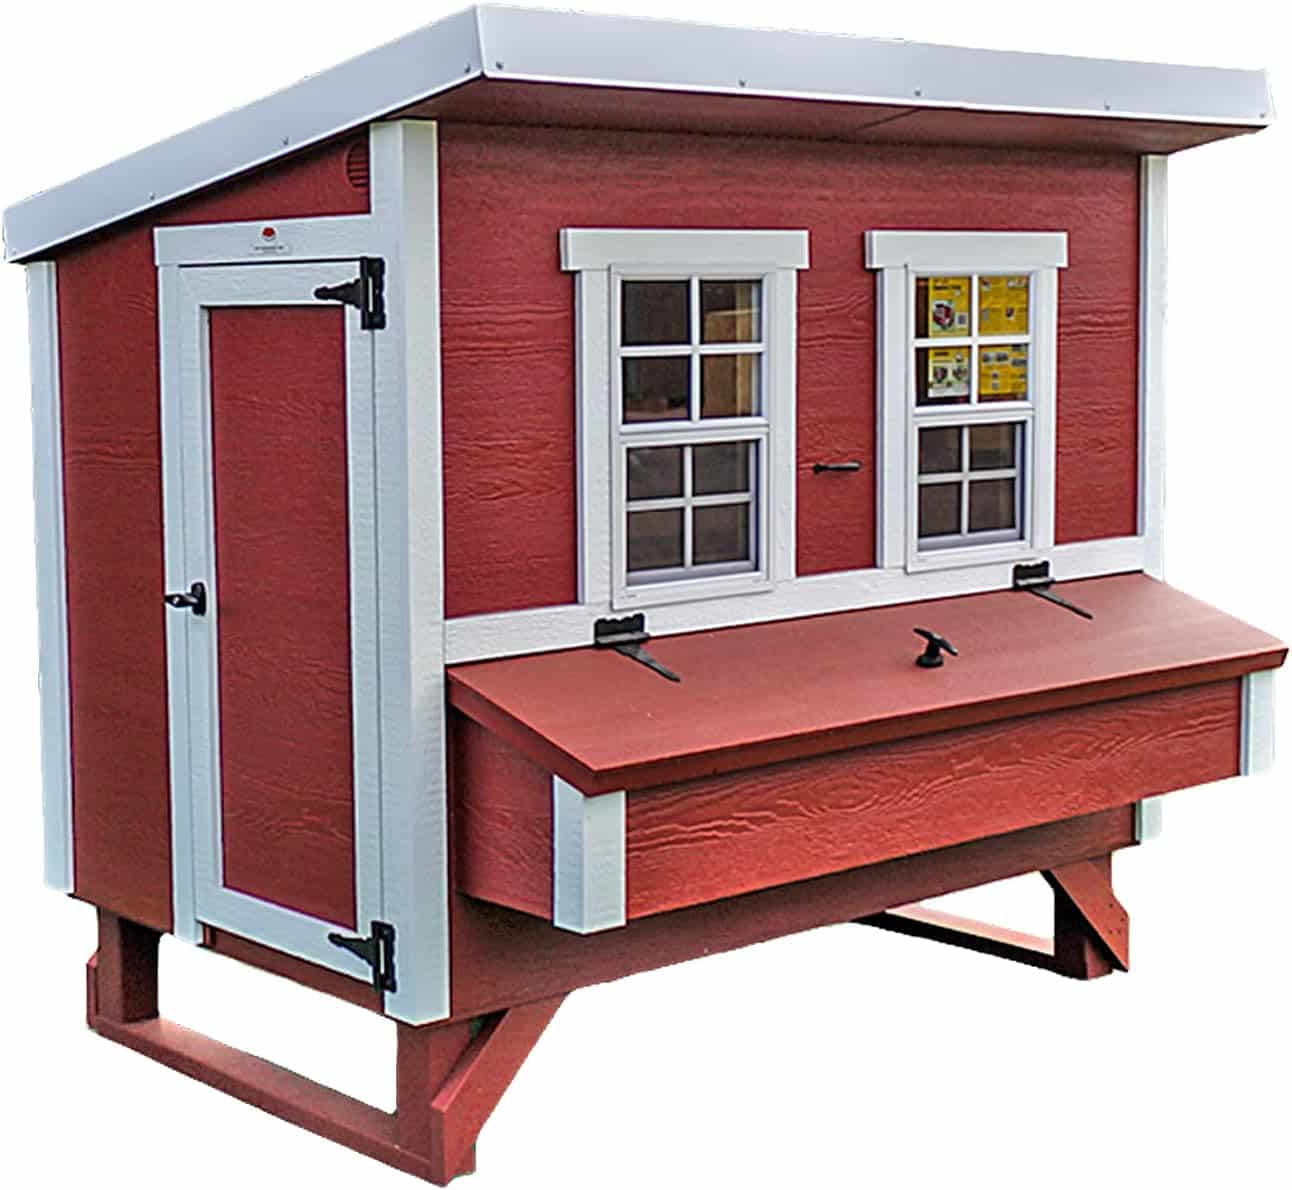
If you’re planning to keep up to 15 birds, this is the premium option worth the extra cost. It’s built from solid wood in the US, ships with flooring already included, and comes with a full-size nesting box bank built in, so you’re not sourcing or building that piece separately. Owners consistently point to the assembly time — most people have it fully built in under an hour with just a screw gun, which is a big deal if you’re not confident with tools.
It costs noticeably more than the metal walk-in options, and for a flock this size you’ll likely want to pair it with a matching run rather than relying on free-ranging alone, especially if predators are active nearby. But for anyone planning to keep a serious-sized flock long-term rather than a starter trio, the build quality and included nesting boxes make it the coop least likely to need replacing or reinforcing down the line.
Pros of the OverEZ Large Coop
- Houses up to 15 chickens with built-in nesting boxes
- Solid wood construction, made in the USA
- Fast assembly, typically under an hour
Cons of the OverEZ Large Coop
- Highest price point of the three
- Doesn’t include a matching run — budget for one separately
- Overkill for flocks under 6-8 birds
Conclusion
Whether you build it yourself or buy a ready-made kit, the fundamentals of a good chicken coop don’t change: enough space per bird, hardware cloth over every gap, real ventilation, and nesting boxes set up so hens use them instead of sleeping in them. Get those right and the coop will keep your flock safe and productive for years. Once your coop is sorted, the next thing worth automating is feeding — take a look at our guide to choosing the best chicken feeder to cut down on daily chores, or head back to our full guide to raising chickens if you’re still working out the basics of your flock.
FAQ — Building a Chicken Coop
Once the coop is built, the single upgrade that most changes daily life with a flock is an automatic chicken coop door, which handles the dawn opening and, more importantly, the dusk closing that keeps predators out.
Budget at least 4 square feet of coop floor space per bird, plus 8-10 square feet of outdoor run space per bird if they won’t be free-ranging all day. Bigger is almost always better than tight.
A basic DIY coop for 4-6 birds typically runs $200-$500 in materials. Pre-built kits range from around $150 for a small starter hutch to $1,000+ for a large walk-in coop for 15+ birds.
Reclaimed lumber, pallets, and secondhand materials from Facebook Marketplace or Craigslist can cut costs significantly. Focus your budget on hardware cloth and secure latches — predator-proofing is not the place to cut corners, even on a tight budget.
Yes. A sealed-up coop traps moisture and ammonia from droppings, which is more likely to make chickens sick than cold air is. Keep vents open above roost height year-round and rely on deep litter bedding, not a sealed box, to keep birds warm.
Cover every opening with 1/2-inch hardware cloth (not chicken wire), bury or pin wire around the run’s perimeter to stop diggers, use predator-proof latches, and lock the coop every night without exception.
Building is usually cheaper and fully customizable if you’re comfortable with basic carpentry. Buying a kit saves time and guarantees a predictable result, which is often worth the premium for a first-time chicken keeper.